Crispy Breaded Halloumi Fingers Recipe
Introduction
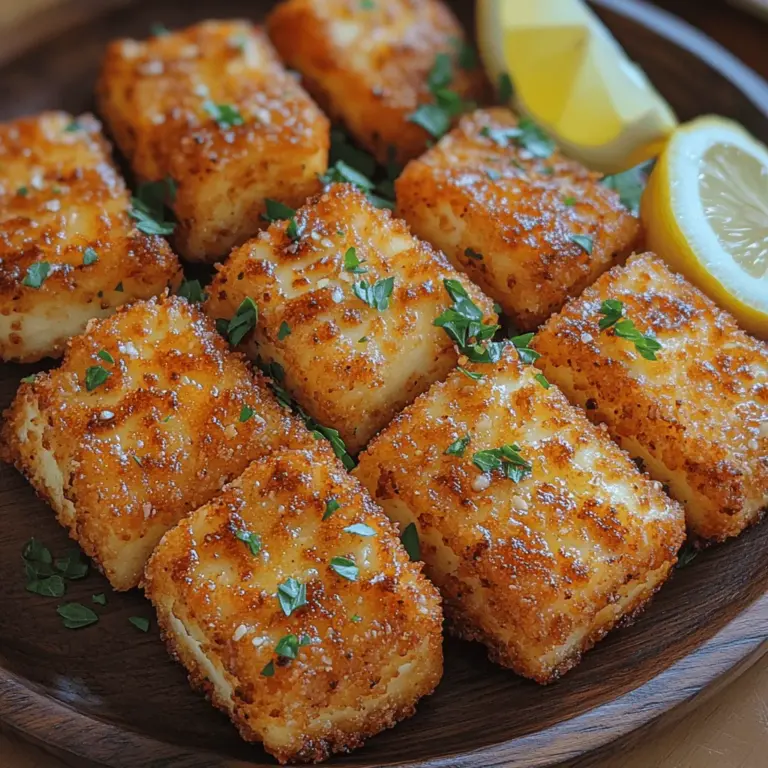
Halloumi cheese has gained immense popularity in recent years, not just for its unique flavor but also for its versatility in various cuisines. Originating from Cyprus, this semi-hard, unripened cheese is made from a mixture of goat’s and sheep’s milk, giving it a distinctive taste and a slightly salty profile. One of the key attributes of halloumi is its high melting point, which allows it to be grilled or fried without losing its shape. As more people seek quick and delicious snacks or appetizers to enjoy at home, crispy breaded halloumi fingers have emerged as a delightful option that satisfies both cravings and dietary needs.
In this recipe, readers can expect to create halloumi fingers that are not only easy to prepare but also pack a punch of flavor and texture. The crispy coating, achieved through a careful breading process, complements the chewy, savory interior of the halloumi. Whether served as a party appetizer, a fun snack for the kids, or a quick side dish, these halloumi fingers are sure to impress anyone who takes a bite.
Understanding Halloumi Cheese
Before diving into the recipe, it’s essential to understand what makes halloumi cheese such a fantastic ingredient for this dish. Halloumi has a rich history that dates back centuries in Cyprus, where it has been a staple in local diets. The cheese is known for its unique texture—firm yet slightly squeaky when bitten into. This texture makes it particularly appealing for frying and grilling, as it holds its shape and develops a delicious golden crust.
In addition to its delightful mouthfeel, halloumi is also a nutritious choice. It is a good source of protein, calcium, and essential vitamins, making it a relatively healthy option compared to other cheeses. This nutritional profile is part of the reason why halloumi has found its way into various dishes across Mediterranean and Middle Eastern cuisines.
One of the standout features of halloumi is its versatility. It can be enjoyed on its own, incorporated into salads, or transformed into crispy bites like our halloumi fingers. When cooked, halloumi develops a savory flavor that pairs beautifully with a variety of seasonings and dips, making it a crowd-pleaser at gatherings.
Ingredients Breakdown
Creating crispy breaded halloumi fingers requires a few key ingredients, each playing a vital role in achieving the perfect result. Here’s what you’ll need:
– Halloumi cheese: When selecting halloumi, look for a block that feels firm and has a slightly springy texture. Many grocery stores now carry halloumi, but it’s essential to choose a high-quality brand for the best flavor. If you can’t find halloumi, consider using other firm cheeses like queso blanco or paneer, though the taste and texture will differ.
– All-purpose flour: This is a crucial component of the breading process. The flour creates a dry surface on the halloumi, allowing the egg to adhere better and forming a solid base for the breadcrumbs. It’s best to use plain all-purpose flour without any additives for the most effective coating.
– Eggs: Eggs act as a binding agent in the breading process. They help the breadcrumbs stick to the halloumi, creating that sought-after crispy exterior. Ensure that the eggs are beaten well to create an even coating.
– Panko breadcrumbs: For the crispiest texture, panko breadcrumbs are the ideal choice. These Japanese-style breadcrumbs are coarser than traditional breadcrumbs and create a light, airy crunch when fried. If you can’t find panko, regular breadcrumbs can be used, but the texture will differ.
– Spices (smoked paprika and garlic powder): Adding spices enhances the flavor of the halloumi fingers. Smoked paprika gives a subtle smokiness and a beautiful color, while garlic powder adds depth and richness. Feel free to adjust the spices to your taste or add other favorites like cayenne for heat or dried herbs for freshness.
– Olive oil: When it comes to frying, olive oil is a flavorful option that complements the taste of halloumi. It has a high smoke point, making it suitable for frying at higher temperatures. Use extra virgin olive oil for the best flavor, but any good-quality olive oil will work well.
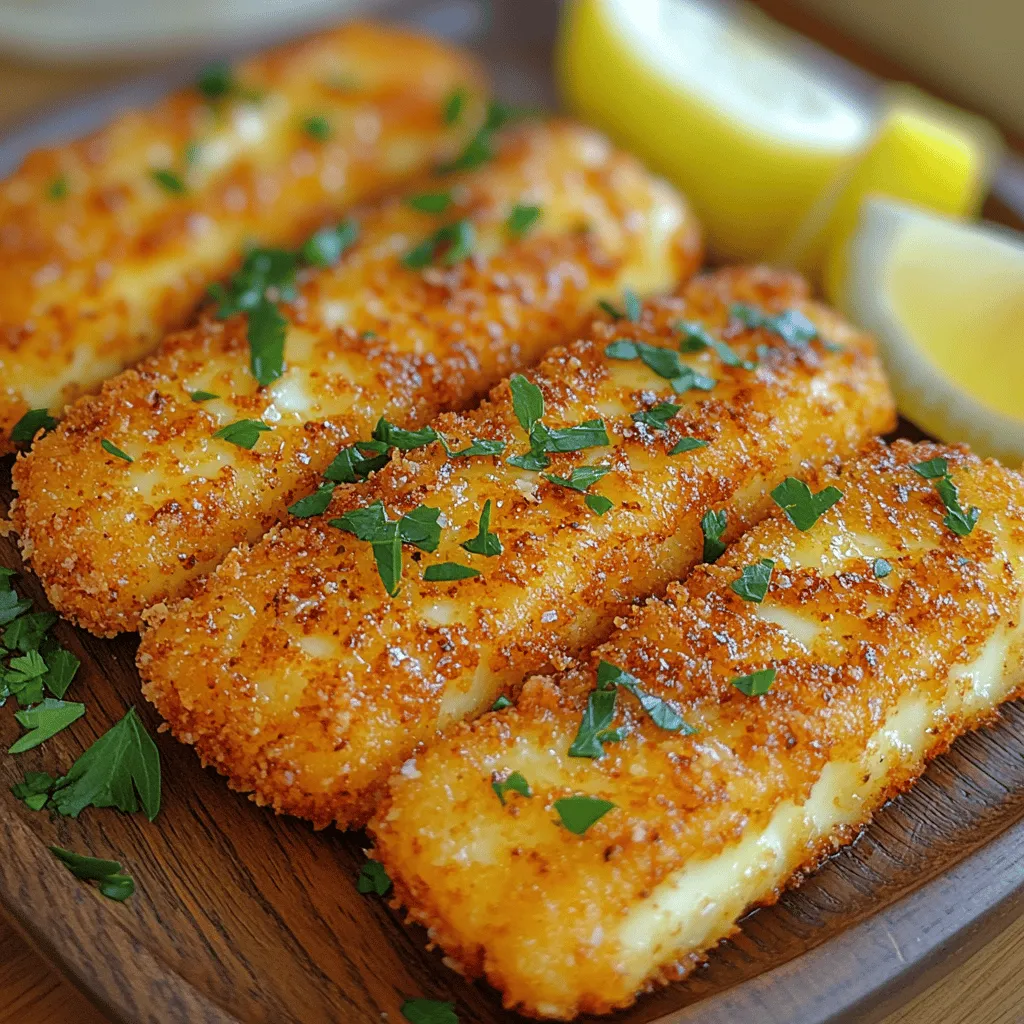
– Fresh parsley and lemon wedges: For garnish and serving, fresh parsley adds a pop of color and freshness, while lemon wedges provide a zesty kick that brightens the dish. Squeezing fresh lemon juice over the crispy halloumi fingers just before serving elevates the flavors and balances the richness of the cheese.
Preparation Steps for Crispy Breaded Halloumi Fingers
Now that we have gathered our ingredients, it’s time to prepare the crispy breaded halloumi fingers. The process is straightforward, making it an excellent choice for cooks of all skill levels. Here are the initial steps to get started:
1. Cut the Halloumi: Begin by slicing the halloumi cheese into fingers or strips, about half an inch thick. This size is ideal for frying, as it allows for a crispy exterior while ensuring the inside remains warm and soft. Aim for uniform sizes to ensure even cooking.
2. Set Up Your Breading Station: To make the breading process efficient, set up a three-part station. In one shallow dish, place the all-purpose flour. In the second dish, beat the eggs until they are well combined. In the third dish, add the panko breadcrumbs mixed with smoked paprika and garlic powder. This setup allows for a seamless dipping process, which is key to achieving that perfect crunch.
3. Coat the Halloumi Fingers: Start by taking a halloumi finger and dredging it in the flour, ensuring that it is coated evenly on all sides. Shake off any excess flour before dipping it into the beaten egg. Allow the excess egg to drip off, and then place the halloumi finger in the breadcrumb mixture. Press gently to ensure the breadcrumbs adhere well, creating a thick, even coating. Repeat this process for all the halloumi strips.
4. Heat the Oil: In a large skillet, heat a generous amount of olive oil over medium-high heat. You want enough oil to cover the bottom of the pan, allowing for even frying. To test if the oil is hot enough, drop a few breadcrumbs into the oil—if they sizzle and bubble, it’s ready for frying.
5. Fry the Halloumi Fingers: Carefully place the breaded halloumi fingers in the hot oil, making sure not to overcrowd the pan. Fry them for about 2-3 minutes on each side, or until they are golden brown and crispy. Use tongs or a slotted spoon to flip them gently, ensuring they cook evenly without losing their shape.
This initial preparation sets the foundation for creating delicious crispy breaded halloumi fingers that are sure to impress. In the next part of the article, we will continue with additional steps, serving suggestions, and tips to ensure your halloumi fingers turn out perfectly every time.
Step-by-Step Preparation Process
Preparing the Halloumi: Slicing Techniques and Moisture Removal
To achieve the perfect crispy breaded halloumi fingers, the first step is to prepare the halloumi cheese properly. Start by cutting the halloumi into even slices, about 1/2 inch thick. This thickness is ideal; it allows for a satisfying cheese texture without becoming overly chewy. Use a sharp knife to ensure clean cuts, which will help the cheese retain its shape during cooking.
After slicing, it’s essential to remove as much moisture as possible. Halloumi can be quite moist, which can affect the breading adherence. To do this, place the slices on a clean kitchen towel or paper towels, and gently press down to absorb excess moisture. Let them sit for about 10 minutes; this will help the breading stick better during frying.
Setting Up the Breading Stations: Organization Tips for Efficiency
A well-organized breading station is key to ensuring an efficient cooking process. You’ll need three distinct areas for the breading process:
1. Flour Station: Place all-purpose flour in a shallow dish, seasoned with salt and pepper. This will be the first step in the breading process.
2. Egg Wash Station: In a separate bowl, beat a couple of eggs until smooth. You may also add a splash of water or milk for extra richness.
3. Breadcrumb Station: Finally, have a shallow dish filled with breadcrumbs ready. You can use plain breadcrumbs or panko for extra crunch. Season the breadcrumbs with herbs and spices such as garlic powder, paprika, or mixed Italian herbs for additional flavor.
Make sure to arrange these stations in a line for easy access. This setup allows you to move quickly from one step to the next without any mess. Having all your ingredients prepared and within reach helps streamline the cooking process, making it both efficient and enjoyable.
Detailed Instructions for Breading Halloumi: Ensuring Even Coating and Adherence
Once your stations are set up, it’s time to bread the halloumi. Follow these steps for perfect adherence:
1. Coat in Flour: Take a slice of halloumi and dip it into the flour, ensuring that it is evenly coated on all sides. Shake off any excess flour; this step helps the egg wash stick better.
2. Dip in Egg Wash: Next, transfer the floured halloumi slice to the egg wash, ensuring it is fully submerged. Allow any excess egg to drip off.
3. Cover with Breadcrumbs: Finally, place the egg-coated halloumi slice in the breadcrumbs. Press gently to ensure the crumbs adhere well to the cheese, covering it completely. Repeat this process for all slices, placing the breaded halloumi fingers on a plate or baking sheet lined with parchment paper.
Frying Technique for Perfectly Crispy Halloumi
Importance of Oil Temperature: How to Test for Readiness
The frying technique is crucial for obtaining the perfect crispy texture. To start, choose a frying oil with a high smoke point, such as canola or vegetable oil. Pour enough oil into a deep skillet or frying pan to cover the bottom by about 1/4 inch. Heat the oil over medium-high heat.
To test if the oil is ready, drop a small piece of bread into the oil. If it sizzles immediately and rises to the surface, the oil is at the right temperature. Alternatively, you can use a kitchen thermometer; the oil should reach about 350°F (175°C) for optimal frying.
Frying Method: Tips for Batch Cooking and Avoiding Overcrowding
When frying, avoid overcrowding the pan. Fry in batches to maintain the oil temperature, ensuring a crispy exterior. Carefully place a few breaded halloumi fingers into the hot oil, ensuring there is enough space between them. Overcrowding can lead to steaming rather than frying, resulting in a less crispy texture.
Cooking Time: Achieving the Perfect Golden Brown Color
Fry the halloumi fingers for about 2-3 minutes on each side, or until they are golden brown and crispy. Keep an eye on them to avoid burning, flipping them gently with tongs or a slotted spoon for even cooking. Once they reach the desired color, transfer the fried halloumi fingers to a plate lined with paper towels to absorb any excess oil.
Serving Suggestions
Creative Ways to Present Crispy Halloumi Fingers
Presentation is key when serving crispy breaded halloumi fingers. Arrange them on a large platter, garnished with fresh herbs like parsley or dill. For added flair, you could serve them in a rustic basket lined with parchment paper. This not only looks appealing but also makes it easy for guests to grab a finger or two.
Ideal Dipping Sauces or Accompaniments
Crispy halloumi fingers are delicious on their own, but they shine even more when paired with the right dipping sauces. Here are a few ideas to enhance your serving experience:
– Tzatziki Sauce: A refreshing cucumber and yogurt dip that complements the salty flavor of halloumi.
– Sweet Chili Sauce: Adds a sweet and spicy kick that balances the richness of the cheese.
– Garlic Aioli: A creamy garlic sauce that brings a gourmet touch to the dish.
– Spicy Tomato Salsa: A zesty, tangy option that works well with fried foods.
Pairing Ideas: Beverages or Side Dishes That Complement the Halloumi
For beverages, consider pairing your crispy halloumi fingers with a light, refreshing drink. A crisp white wine like Sauvignon Blanc or a light beer can complement the flavors beautifully. If you prefer non-alcoholic options, a sparkling water with lemon or a homemade lemonade can elevate the meal.
As for side dishes, a simple arugula salad dressed with lemon vinaigrette can provide a fresh contrast to the richness of the halloumi. Alternatively, serve alongside roasted vegetables or a quinoa salad for a well-rounded meal.
Health Considerations
Nutritional Information for Halloumi Fingers Per Serving
While crispy breaded halloumi fingers are undeniably delicious, it’s important to consider their nutritional content. A serving of three halloumi fingers (approximately 100g) contains roughly:
– Calories: 300
– Protein: 20g
– Total Fat: 22g
– Saturated Fat: 11g
– Carbohydrates: 18g
– Fiber: 1g
– Sodium: 800mg
These values can vary based on the specific ingredients and cooking methods used. Keep in mind that halloumi is naturally high in salt and fat, which is why moderation is key.
Discussion on Moderation and Balance in a Diet Featuring Fried Foods
While it’s tempting to indulge in crispy fried snacks, it’s essential to enjoy them in moderation as part of a balanced diet. Incorporate plenty of fresh fruits, vegetables, whole grains, and lean proteins into your meals to ensure a well-rounded diet. Reserve fried foods like halloumi fingers for special occasions or as an occasional treat.
Alternatives for Healthier Versions, Such as Baking or Air Frying
For those looking to enjoy halloumi fingers with fewer calories and less fat, consider baking or air frying as healthier alternatives. To bake, preheat your oven to 400°F (200°C), place the breaded halloumi fingers on a baking sheet lined with parchment paper, and lightly spray them with cooking oil. Bake for 15-20 minutes, flipping halfway through, until golden and crispy.
An air fryer is another excellent option. Preheat the air fryer to 375°F (190°C) and cook the breaded halloumi fingers for about 10-12 minutes, shaking the basket halfway through for even cooking. Both methods yield delicious results without the need for deep frying.
Conclusion
Crispy breaded halloumi fingers are not only simple to prepare but also incredibly delicious and versatile. This recipe offers a perfect balance of textures and flavors, making it a delightful snack or appetizer for any gathering. Whether enjoyed with a variety of dipping sauces or paired with fresh salads and drinks, halloumi fingers are sure to impress.
I encourage you to try this recipe at home and share your experiences. Discover the joy of crispy halloumi fingers and explore the many ways you can enjoy this delightful cheese. With its unique flavor profile and satisfying texture, halloumi is a fantastic addition to your culinary repertoire, whether as a snack or a part of a more elaborate meal.
