Introduction
In the world of comfort food, few dishes can compete with crispy chicken tenders. These beloved strips of chicken are synonymous with satisfying crunch and savory flavor, making them a favorite for both kids and adults alike. Our Crispy Lemon Pepper Chicken Tenders take this classic favorite to new heights by introducing the bright, zesty flavor of lemon and the satisfying crunch of panko breadcrumbs. This recipe is ideal for a weeknight dinner, a game day snack, or as a delightful addition to any gathering. Not only is it delicious, but the preparation is straightforward, ensuring that even novice cooks can produce a restaurant-quality dish right in their own kitchens.
Chicken tenders have a rich history in American cuisine, often associated with casual dining and comfort. They are typically made from chicken breast meat, which is tender, juicy, and perfect for frying or baking. The addition of lemon pepper seasoning elevates these tenders by providing a refreshing brightness that cuts through the richness of the fried coating. This combination of flavors and textures makes Crispy Lemon Pepper Chicken Tenders a must-try recipe.
As we delve into the preparation of these irresistible chicken tenders, we will explore the key ingredients that contribute to their unforgettable taste and texture, followed by a detailed walkthrough of the cooking process.
Understanding the Ingredients
The foundation of any great dish lies in its ingredients. For Crispy Lemon Pepper Chicken Tenders, several key components contribute to the overall flavor and texture. Let’s take a closer look at each of these ingredients and their roles in creating this mouthwatering dish.
The Star Ingredient: Chicken Tenderloins
At the heart of this recipe are chicken tenderloins, which are the small strips of meat located beneath the chicken breast. Tenderloins are known for their tenderness and juiciness, making them ideal for frying. Unlike other cuts of chicken, they cook quickly and remain moist, ensuring that each bite is succulent and flavorful. When selecting chicken tenderloins, look for fresh, plump pieces with a pinkish hue for the best results.
Flour: The Foundation of Crunch
Flour serves as the foundation for creating that beloved crispy crust on the chicken tenders. A light coating of all-purpose flour helps to absorb moisture from the chicken, creating a barrier that locks in juices during cooking. Additionally, the flour provides a surface for the egg wash and breadcrumbs to adhere to, ensuring an even coating and maximizing crispiness.
Spices and Seasonings: Adding Flavor Complexity
The magic of Crispy Lemon Pepper Chicken Tenders lies in the seasoning blend that enhances the natural flavor of the chicken. A mixture of salt, pepper, garlic powder, and, of course, lemon zest creates a flavor explosion that elevates the dish. Lemon pepper seasoning is particularly effective, as it combines the tang of lemon with the warmth of black pepper, providing layers of complexity to each bite.
Eggs: The Binding Agent
Eggs are a crucial component of the breading process. The egg wash, made by whisking together eggs, acts as a binding agent that helps the flour and breadcrumbs adhere to the chicken. This ensures that the coating remains intact during cooking, resulting in a beautifully crispy exterior. The egg wash also contributes to the overall richness of the dish, adding an additional layer of flavor.
Panko Breadcrumbs: The Secret to Extra Crispiness
Panko breadcrumbs, a Japanese-style breadcrumb, are the secret weapon in achieving an extra crispy texture. Unlike traditional breadcrumbs, panko is coarser and lighter, which allows for air to circulate around the coating during frying. This results in a superior crunch that is both light and satisfying. When using panko, be sure to choose unseasoned varieties to allow the flavors of your spices to shine through.
The Role of Fresh Lemon: Brightness and Zest
Fresh lemon is the star of the show in this recipe. Its bright, tangy flavor not only enhances the seasoning blend but also adds a refreshing element that balances the richness of the fried chicken. The zest of the lemon, in particular, contributes aromatic oils that infuse the chicken with a vibrant citrus note. For the best results, use freshly squeezed lemon juice and freshly grated lemon zest, as opposed to bottled options, to ensure maximum flavor.
Optional Ingredients: Enhancing Flavor with Parsley
While the primary flavors in this dish come from the lemon and pepper, adding finely chopped fresh parsley can provide a pop of color and an additional layer of freshness. Parsley complements the lemon and adds a mild herbaceous note that elevates the overall dish. Though optional, incorporating parsley into the breadcrumb mixture can make your Crispy Lemon Pepper Chicken Tenders even more visually appealing and flavorful.
Preparation Steps Explained
Now that we have a solid understanding of the key ingredients, let’s walk through the preparation steps to ensure you achieve the perfect batch of Crispy Lemon Pepper Chicken Tenders.
Preparing the Chicken: Cleaning and Drying
The first step in preparing your chicken tenders is to clean and dry them thoroughly. Rinse the chicken tenderloins under cold water to remove any residual blood or impurities. Once rinsed, pat them dry with paper towels to eliminate excess moisture. This step is crucial, as moisture can prevent the coating from adhering properly and can lead to soggy tenders. Ensuring that your chicken is dry will help you achieve that coveted crispy texture.
Crafting the Seasoning Mixture: Combining Flour and Spices
Next, prepare your seasoning mixture by combining all-purpose flour with the spices. In a shallow bowl, mix together the flour, salt, black pepper, garlic powder, and lemon zest until evenly blended. This will be the first layer of flavor on your chicken tenders. The use of a shallow dish makes it easy to coat each piece evenly and allows for easy access during the breading process.
Creating the Egg Wash: Whisking for Texture
In a separate bowl, crack a few eggs and whisk them together until the yolks and whites are fully combined. This egg wash will act as a glue for the flour and breadcrumb coating. Whisking the eggs not only creates a uniform texture but also incorporates air, helping the coating to become light and crispy when cooked. Some cooks prefer to add a splash of water or milk to the egg wash, which can create a slightly thinner consistency that may help the coating adhere better.
Combining Breadcrumbs and Parsley: A Flavorful Coating
In another shallow dish, combine panko breadcrumbs with finely chopped parsley, if using. This mixture will provide the final layer of crunch and flavor for your chicken tenders. The parsley should be evenly distributed throughout the breadcrumbs to ensure every tender is coated with both the crispy texture and the fresh herbal notes. The contrast between the golden panko and the vibrant green parsley also adds visual appeal to your dish.
Step-by-Step Coating Technique: Ensuring Proper Coverage
To achieve a perfectly coated chicken tender, follow these steps carefully:
1. Take a chicken tender and dredge it in the seasoned flour mixture, ensuring that it is fully coated. Shake off any excess flour.
2. Next, dip the floured tender into the egg wash, allowing any excess to drip off. This step ensures that the breadcrumbs adhere properly.
3. Finally, place the tender into the panko breadcrumb mixture, pressing lightly to ensure an even coating. Make sure that each side is fully covered with breadcrumbs, resulting in a uniform texture.
4. Repeat the process for each chicken tender, placing the coated pieces on a wire rack or parchment-lined baking sheet. This will prevent them from sticking together and will allow for even cooking.
Frying the Chicken: Achieving the Perfect Golden Brown
With your chicken tenders fully coated, it’s time to fry them to golden perfection. Heat a generous amount of oil in a large skillet over medium-high heat. The oil should be hot enough that a drop of batter sizzles upon contact, but not so hot that it begins to smoke. Carefully add the coated chicken tenders to the hot oil in batches, ensuring not to overcrowd the pan, which can lower the oil temperature and lead to soggy tenders.
Fry the tenders for approximately 3-4 minutes on each side, or until they are golden brown and cooked through. The internal temperature of the chicken should reach 165°F (75°C) for safety. Once cooked, use a slotted spoon to transfer the tenders to a plate lined with paper towels to absorb any excess oil.
As we continue, we will explore serving suggestions, variations to this classic recipe, and tips for perfecting your Crispy Lemon Pepper Chicken Tenders. Stay tuned for the next part of this culinary adventure!

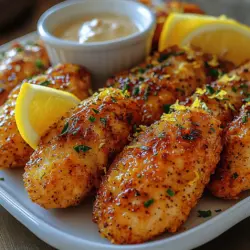
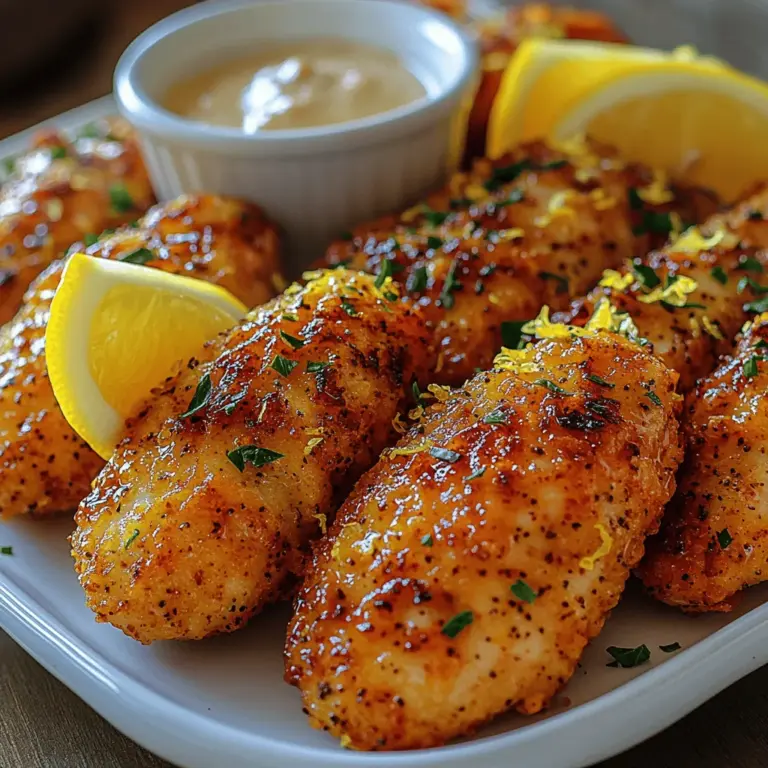
Final Presentation: Serving Suggestions and Garnishes
Once your Crispy Lemon Pepper Chicken Tenders are golden brown and perfectly cooked, it’s time to plate them up in a way that enhances their appeal. Presentation is key when it comes to making a meal memorable. Here are some serving suggestions and garnishing ideas to elevate your dish:
1. Plating the Tenders: Arrange the chicken tenders neatly on a large platter or individual plates. Consider overlapping them slightly for a more appealing look.
2. Garnishes:
– Fresh Herbs: Sprinkle freshly chopped parsley or cilantro over the tenders for a pop of color and freshness.
– Lemon Wedges: Add lemon wedges on the side for an extra burst of citrus flavor. They can also serve as a visual cue to the lemon pepper seasoning.
– Dipping Sauces: Serve with a variety of dipping sauces such as honey mustard, ranch, or a spicy aioli. This not only adds flavor but also allows diners to customize their experience.
3. Accompaniments: Consider serving your chicken tenders with sides like:
– A crisp garden salad for a refreshing contrast.
– Roasted vegetables to add nutritional balance.
– French fries or sweet potato fries for a fun, casual meal.
4. Themed Serving: For a party or a casual gathering, set up a “tender bar” where guests can choose their preferred dipping sauces and toppings. This interactive approach makes the meal more engaging.
Cooking Techniques for Perfect Chicken Tenders
Understanding Frying Methods for Optimal Results
Frying is one of the best methods to achieve that perfect crispy texture for chicken tenders. Here’s what you need to know:
– Pan-Frying vs. Deep-Frying: Pan-frying uses less oil and is easier for beginners. Deep-frying, while more oil-intensive, can yield a uniformly crispy finish. Choose based on your preference and equipment.
Choosing the Right Oil: Types and Heating Tips
The oil you select can impact both flavor and cooking efficiency. Here are some options:
– Vegetable Oil: A neutral flavor, making it a versatile choice.
– Canola Oil: Similar to vegetable oil, with a high smoke point.
– Peanut Oil: Offers a subtle flavor enhancement and is great for frying due to its high smoke point.
Heating Tips:
– Always preheat the oil before adding the chicken. A temperature of around 350°F (175°C) is ideal for frying chicken tenders.
– Use a kitchen thermometer to ensure accuracy.
Maintaining Proper Temperature: Ensuring Crispy Texture
Maintaining the right oil temperature is crucial for crispy chicken:
– Monitor Temperature: If the oil is too hot, the tenders may burn on the outside while remaining raw inside. If it’s too cool, they’ll absorb excess oil and become greasy.
– Adjust as Necessary: If you notice the oil cooling down after adding the chicken, increase the heat slightly to maintain optimal frying conditions.
Batch Cooking: Avoiding Overcrowding in the Pan
Cooking chicken tenders in batches ensures even cooking and prevents the oil temperature from dropping too low:
– Space Them Out: Leave enough space between tenders to allow hot oil to circulate freely.
– Fry in Batches: If you have a large quantity, divide them into smaller portions to maintain consistent frying conditions.
The Importance of Draining: Removing Excess Oil
After frying, it’s essential to remove excess oil to keep your tenders crispy:
– Use Paper Towels: Place cooked tenders on a plate lined with paper towels to absorb residual oil.
– Cooling Rack: For an even better result, place the tenders on a wire rack over a baking sheet. This allows air to circulate around the chicken, keeping them crispy without steaming.
Flavor Enhancements and Variations
While the lemon pepper seasoning is delicious on its own, adding a few twists can take your chicken tenders to the next level.
Adding Heat: Incorporating Spices for a Kick
For those who love a bit of spice, consider these options:
– Cayenne Pepper: A pinch in the breading mixture adds a subtle heat.
– Hot Sauce: Marinate the chicken in a blend of lemon juice and your favorite hot sauce for a fiery twist.
Flavor Infusions: Marinating Chicken for Extra Zest
To amplify the flavor profile of your chicken tenders:
– Marinate: Let the chicken sit in a marinade of lemon juice, garlic, and olive oil for at least 30 minutes before breading. This not only enhances the flavor but also tenderizes the meat.
Alternative Breading Options: Using Different Types of Breadcrumbs
Experiment with different breading to customize the texture and flavor:
– Panko Breadcrumbs: For an extra crunch, use panko breadcrumbs instead of regular breadcrumbs. They create a lighter, airier coating.
– Cornmeal: Mixing cornmeal with breadcrumbs can add a delightful crunch and unique flavor.
Serving Suggestions: Perfect Pairings with Dipping Sauces
Pair your crispy chicken tenders with a variety of dipping sauces to enhance the meal:
– Classic Honey Mustard: A sweet and tangy complement to the lemon pepper flavor.
– Spicy Ranch Dressing: Creamy and zesty, it pairs well with the crispy tenders.
– Garlic Aioli: A rich, garlicky dip that adds depth to each bite.
Nutritional Information
Understanding the health aspects of your Crispy Lemon Pepper Chicken Tenders can help you enjoy them guilt-free.
Caloric Breakdown per Serving
A typical serving of Crispy Lemon Pepper Chicken Tenders contains approximately:
– Calories: 350-400 calories per serving, depending on the size and cooking method.
– Fat: About 20 grams, primarily from the oil used in frying.
Protein Content: Chicken as a Nutrient-Rich Choice
Chicken is a fantastic source of lean protein:
– Protein: Each serving provides around 25-30 grams of protein, making it a great choice for muscle repair and overall health.
– Vitamins and Minerals: Chicken also offers essential nutrients like B vitamins, phosphorus, and selenium.
Balancing Indulgence with Nutrition
While these tenders are indulgent, you can balance them with healthier sides:
– Salads: Pair them with a green salad or steamed vegetables to add fiber and nutrients.
– Whole Grains: Serve alongside quinoa or brown rice for a wholesome meal.
Conclusion
Crispy Lemon Pepper Chicken Tenders are a delightful fusion of flavor and texture that can elevate any meal. With their irresistible crunch and zesty lemon flavor, these tenders are sure to become a favorite in your household. Whether enjoyed as a main dish or a snack, this recipe allows for creativity and personalization, ensuring that each batch can be tailored to your tastes.
Dive into this culinary adventure, and savor the joy of homemade comfort food. With the right techniques and flavor enhancements, your crispy chicken tenders will not only impress your family and friends but will also keep them coming back for more. Enjoy the process of cooking, and don’t hesitate to experiment with different flavors and presentations to make this dish uniquely yours.