Introduction to Decadent No Bake Turtle Mini Cheesecakes
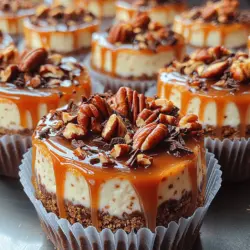
Indulging in a rich and creamy dessert doesn’t always require hours in the kitchen. Enter the Decadent No Bake Turtle Mini Cheesecakes—a delightful treat that combines the classic flavors of turtle candies with the smooth texture of cheesecake. Perfect for gatherings, celebrations, or a simple weeknight indulgence, these mini cheesecakes are easy to prepare, requiring minimal effort while delivering maximum flavor. The no-bake aspect makes them an accessible choice for both novice bakers and seasoned chefs alike, allowing everyone to enjoy a slice of heaven without the need for an oven.
Turtle candies, known for their signature combination of chocolate, caramel, and nuts, inspire these mini cheesecakes. The allure of turtle flavors lies in their richness and contrast—sweet, salty, and creamy. By translating these beloved flavors into a cheesecake format, you not only get the satisfying richness of a traditional dessert but also a refreshing twist that’s perfect for warmer weather or any occasion that calls for a sweet treat.
In this article, we will explore the ingredients that bring these cheesecakes to life, step-by-step instructions to guide you through the preparation process, and tips to ensure that your mini cheesecakes turn out perfectly every time. Let’s dive into the magic behind these delightful bite-sized desserts!
Understanding the Ingredients
Exploring the Key Components of Turtle Mini Cheesecakes
Creating the perfect turtle mini cheesecakes starts with understanding the key ingredients that come together to create this delicious dessert. Each component plays a crucial role in achieving the right flavor, texture, and overall experience.
Graham Cracker Crumbs: The Foundation of the Crust
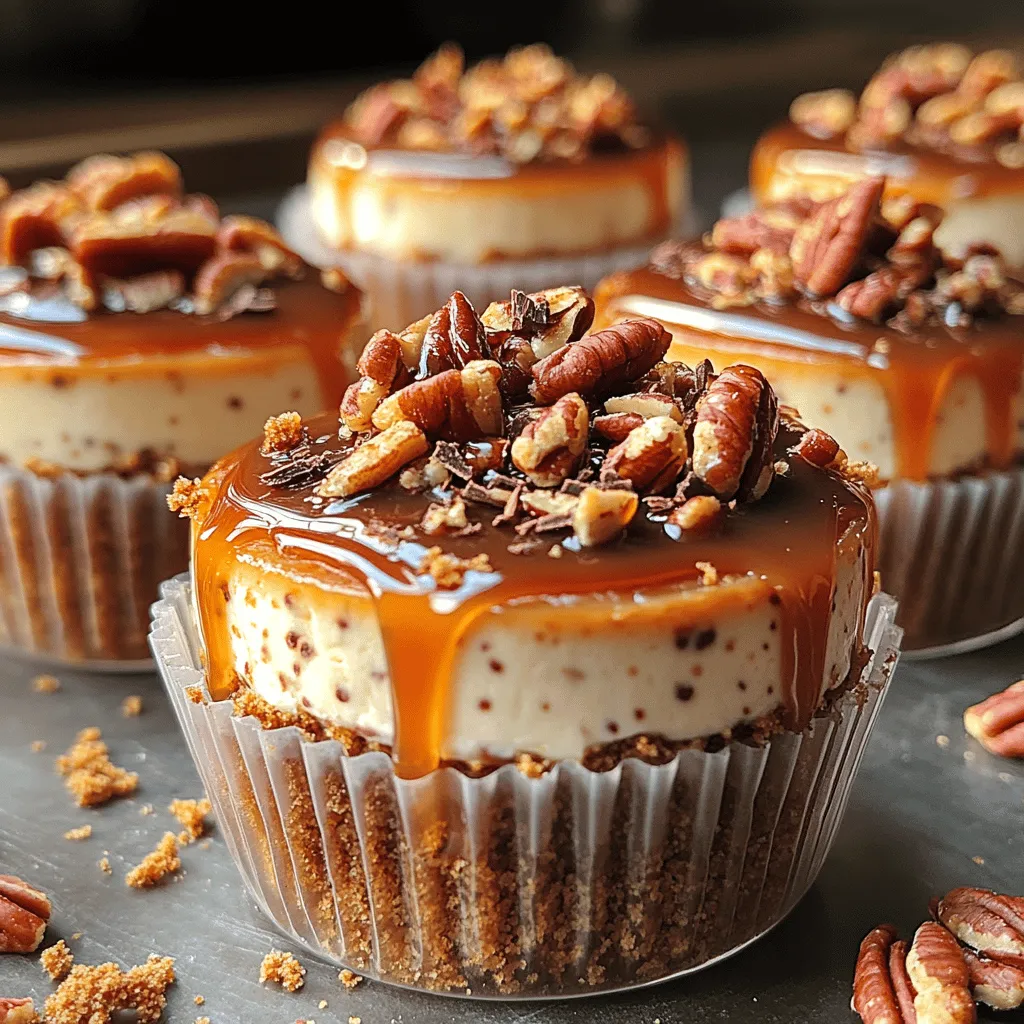
The crust of our mini cheesecakes begins with graham cracker crumbs, a staple in many cheesecake recipes. These crumbs provide a sweet and slightly nutty flavor that pairs beautifully with the rich filling. When combined with butter and sugar, the graham cracker crumbs create a sturdy and flavorful base that adds texture to each bite.
Using finely crushed graham crackers ensures that the crust is not only tasty but also holds together well when pressed into the bottom of the mini cheesecake cups. The crumbly texture adds a delightful contrast to the creamy filling, making each mouthful a well-rounded experience.
Unsalted Butter: For Balanced Flavor
Unsalted butter is another key player in the crust, contributing richness and helping to bind the graham cracker crumbs together. The absence of salt allows for better control over the overall flavor of the dessert. By using unsalted butter, you can adjust the saltiness in your recipe based on taste preferences, ensuring a balanced flavor profile without any unexpected salty undertones.
Brown Sugar: Sweetness Amplified
To enhance the sweetness of the crust, we incorporate brown sugar. This ingredient not only adds sweetness but also a hint of caramel flavor, which complements the turtle theme of the cheesecake. The moistness of the brown sugar helps to create a more cohesive crust that holds together well. Additionally, the molasses content in brown sugar contributes to a slightly deeper flavor compared to white sugar, elevating the overall taste experience.
Cream Cheese: The Heart of the Cheesecake
At the core of every cheesecake is cream cheese, and for our turtle mini cheesecakes, it’s no different. Using softened cream cheese is crucial for achieving a smooth and creamy filling. When cream cheese is at room temperature, it blends effortlessly with the other ingredients, resulting in a velvety texture that melts in your mouth.
Powdered Sugar: Sweetening and Stabilizing
To sweeten our cheesecake filling, we use powdered sugar. This type of sugar dissolves easily into the cream cheese, ensuring a smooth consistency without any graininess. Additionally, powdered sugar contains a small amount of cornstarch, which helps stabilize the filling, making it less prone to collapsing once set. The sweetness level can be adjusted based on your personal preference, allowing you to create a dessert that suits your taste perfectly.
Whipped Cream: Adding Lightness and Texture
One of the secrets to achieving that light and airy texture in the cheesecake filling is incorporating whipped cream. Whipping heavy cream to stiff peaks creates a fluffy texture that elevates the cream cheese mixture.
The Whipping Process
To whip heavy cream effectively, start with cold cream and use a chilled bowl and beaters if possible. This helps the cream whip up faster and achieve the desired stiffness. Once the cream reaches stiff peaks, gently fold it into the cream cheese mixture. This folding technique ensures that you retain the airiness of the whipped cream, leading to a light and delightful cheesecake filling.
Toppings: The Finishing Touches
No turtle dessert is complete without its signature toppings, and our mini cheesecakes are no exception. The toppings add flavor complexity and visual appeal, making them even more enticing.
Caramel and Chocolate Sauces
The inclusion of caramel and chocolate sauces is what truly brings the turtle experience to life. Drizzling these sauces over the top of your mini cheesecakes not only enhances their sweetness but also adds richness and depth. You can use store-bought sauces for convenience or make your own for that extra homemade touch. Either way, these toppings create a luscious layer that complements the creamy filling beautifully.
Nuts: Choosing the Perfect Crunch
Finally, we must consider the nuts that add a crunchy texture to our mini cheesecakes. While traditional turtle candies often use pecans, walnuts are a delicious alternative that can also be used. The choice between these nuts ultimately comes down to personal preference. Chopped nuts sprinkled on top of the cheesecakes provide not only crunch but also a nutty flavor that pairs perfectly with the other elements of the dessert.
Step-by-Step Preparation
Now that we understand the essential ingredients that create our Decadent No Bake Turtle Mini Cheesecakes, let’s move on to the preparation process. Follow these detailed steps to craft your own delightful mini cheesecakes.
Preparing the Crust: The Foundation of Flavor
The first step in making these mini cheesecakes is preparing the crust. A well-made crust is essential for providing a solid base that supports the creamy filling and enhances the overall flavor of the dessert.
Detailed Instructions for Combining Ingredients
1. Crush the Graham Crackers: Start by crushing about 1 ½ cups of graham crackers into fine crumbs. You can do this by placing them in a zip-top bag and using a rolling pin to crush them, or by pulsing them in a food processor.
2. Mix with Butter and Sugar: In a mixing bowl, combine the crushed graham crackers with ½ cup of melted unsalted butter and ¼ cup of brown sugar. Stir until the mixture is well combined and resembles wet sand.
3. Press into Mini Cheesecake Cups: Using a tablespoon or your fingers, firmly press the crumb mixture into the bottom of each mini cheesecake cup or muffin tin. Ensure that the crust is even and compact, as this will provide the necessary support for the cheesecake filling.
Tips for Pressing the Crust Firmly
To achieve the perfect crust, it’s important to press firmly but gently to avoid breaking the crumbs apart. You can use the bottom of a small glass or measuring cup to help compact the crust evenly. Make sure to cover the entire bottom of the cup, as this will contribute to the stability of the mini cheesecakes during serving.
Crafting the Cheesecake Filling: A Creamy Delight
With the crust ready, it’s time to prepare the cheesecake filling, which is the star of the show. Follow these steps to achieve a silky, smooth filling that’s bursting with flavor.
1. Beat the Cream Cheese: In a mixing bowl, add 16 ounces of softened cream cheese. Using an electric mixer, beat the cream cheese on medium speed until it’s smooth and creamy, about 2-3 minutes. Scrape down the sides of the bowl as needed to ensure even mixing.
2. Incorporate the Powdered Sugar: Gradually add in ½ cup of powdered sugar while continuing to mix on low speed. Once incorporated, increase the speed to medium and beat until the mixture is fully blended and smooth.
3. Fold in the Whipped Cream: In a separate bowl, whip 1 cup of heavy cream until stiff peaks form. Gently fold the whipped cream into the cream cheese mixture using a spatula. Be careful not to deflate the whipped cream—this will help keep the filling light and airy.
4. Assemble the Cheesecakes: Once your filling is ready, spoon it over the prepared crusts in the mini cheesecake cups. Use a spatula or the back of a spoon to smooth the tops for an even finish.
Now that you have the crust and filling prepared, your mini cheesecakes are well on their way to becoming a crowd favorite. By understanding the ingredients and following these step-by-step instructions, you’re set to create a dessert that’s not only visually appealing but also incredibly delicious. In the following sections, we will explore tips for best results and address common questions that arise when preparing these delightful treats. Stay tuned for more insights on perfecting your Decadent No Bake Turtle Mini Cheesecakes!
Techniques for Mixing Cream Cheese and Powdered Sugar to Eliminate Lumps
Creating the perfect filling for your Decadent No Bake Turtle Mini Cheesecakes begins with the careful blending of cream cheese and powdered sugar. To achieve a smooth and creamy texture, it’s essential to prepare your cream cheese properly. Start by allowing the cream cheese to sit at room temperature for about 30 minutes before mixing. This step softens the cream cheese, making it easier to blend and reducing the likelihood of lumps.
Next, use a hand mixer or a stand mixer fitted with a paddle attachment. Begin mixing the softened cream cheese alone until it becomes fluffy and creamy, which usually takes about 1-2 minutes. After the cream cheese is light and airy, gradually add the powdered sugar while continuing to mix on low speed. This method prevents the sugar from flying out of the bowl and allows it to incorporate smoothly. If you still notice any lumps after mixing, you can switch to a spatula and gently fold the mixture by hand, scraping down the sides of the bowl to ensure even blending.
Importance of Gentle Folding to Retain the Airiness of the Whipped Cream
The whipped cream is a key component that adds lightness to your cheesecake filling. After whipping your heavy cream until stiff peaks form, it’s crucial to fold it gently into the cream cheese mixture. This technique preserves the airiness created during whipping, which is essential for achieving a light and fluffy cheesecake.
To fold the whipped cream properly, use a large spatula and scoop from the bottom of the bowl, lifting the mixture and gently combining it with the cream cheese. Rotate the bowl as you fold, ensuring that you incorporate the whipped cream without deflating it. The goal is to achieve a uniform mixture that remains light and airy, providing that delightful texture in the final cheesecake.
Layering the Cheesecakes: Building Flavor and Visual Appeal
The layering process is where the magic happens, transforming simple ingredients into a beautiful dessert. Begin by spooning a generous amount of the cheesecake filling into each mini cheesecake cup. Use a small offset spatula or the back of a spoon to smooth the top of the filling, ensuring an even and appealing surface. This step not only enhances the visual presentation but also sets the stage for the delicious toppings to come.
Techniques for Decorating with Caramel and Chocolate Sauces
Once your cheesecake filling is in place, it’s time to add those signature turtle flavors. Drizzle caramel and chocolate sauces over the top of each mini cheesecake. For a more controlled application, consider using a squeeze bottle or a piping bag. This technique allows for intricate designs, creating an eye-catching pattern that adds to the dessert’s allure.
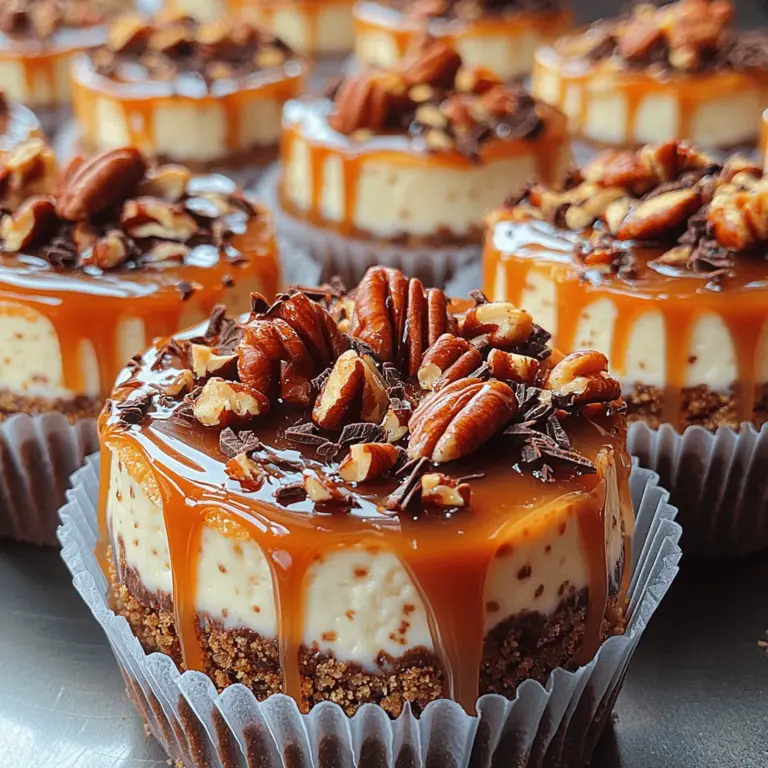
You can also create a simple marbled effect by alternating the caramel and chocolate sauces. Use a toothpick to gently swirl the sauces together, creating a beautiful design that mirrors the decadence of the turtle theme. For an extra touch of elegance, sprinkle crushed nuts—like pecans or walnuts—on top, enhancing both flavor and texture.
Chilling for Perfection: Setting the Cheesecakes
After assembling your mini cheesecakes, they require proper chilling to achieve the ideal texture. Place them in the refrigerator and allow them to set for at least 4 hours, though overnight is preferable for optimal firmness. This chilling time is essential, as it allows the filling to solidify while the flavors meld beautifully.
Understanding the Chilling Time Required for Optimal Texture
The science behind refrigeration is straightforward: cooler temperatures slow down the movement of molecules, which helps the filling firm up. As the cheesecake chills, the gelatin (if used) will also work to stabilize the filling, ensuring that each bite holds its shape. A well-chilled cheesecake will be creamy yet firm, providing the perfect contrast to the crunchy crust.
Serving Suggestions
Presenting Your Mini Cheesecakes Elegantly
When it comes to serving your Decadent No Bake Turtle Mini Cheesecakes, presentation is key. Consider using decorative dessert cups or glass jars to showcase the beautiful layers and toppings. Place each mini cheesecake on a small dessert plate, and garnish with additional drizzles of caramel and chocolate sauce, as well as a sprinkle of chopped nuts for added texture.
For gatherings and celebrations, arrange the mini cheesecakes on a tiered dessert stand, which adds height and visual interest to your dessert table. This presentation not only makes a striking impact but also allows guests to easily serve themselves.
Creative Garnishing Ideas to Enhance Visual Appeal
Enhancing the visual appeal of your cheesecakes can be as simple as adding a dollop of whipped cream on top, garnished with a pecan half or a sprinkle of sea salt. Edible flowers can also provide a pop of color and a touch of elegance. For a more festive look, consider using seasonal decorations, such as chocolate shavings or themed sprinkles, to match the occasion.
Pairing Suggestions for a Complete Dessert Experience
To elevate your dessert experience further, think about pairing your mini cheesecakes with complementary beverages. Rich coffee or espresso pairs wonderfully with the creamy sweetness of the cheesecakes, enhancing the overall flavor profile. For a non-caffeinated option, consider serving chai tea, which brings warm spices that harmonize beautifully with the chocolate and caramel.
If you want to create a more extensive dessert spread, consider offering a variety of desserts that contrast with the richness of your mini cheesecakes. Light fruit tarts, sorbets, or even a simple charcuterie board with cheese and crackers can create an inviting dessert table that pleases a range of tastes.
Nutritional Insights
Analyzing the Nutritional Content of Turtle Mini Cheesecakes
Understanding the nutritional content of your Decadent No Bake Turtle Mini Cheesecakes can help you enjoy them mindfully. Generally, each mini cheesecake contains approximately 250-300 calories, depending on specific ingredient choices and portion sizes. The breakdown typically includes around 18-20 grams of fat, 25-30 grams of carbohydrates, and 3-5 grams of protein per serving.
While these mini cheesecakes are certainly indulgent, they can be enjoyed in moderation. The key to mindful eating is to savor each bite and appreciate the rich flavors, allowing you to feel satisfied without overindulging.
Discussion on Indulgence vs. Moderation and How to Enjoy Desserts Mindfully
It’s essential to recognize that desserts like these mini cheesecakes are meant to be a treat rather than a daily staple. By practicing moderation, you can enjoy the rich flavors of your turtle cheesecakes while maintaining a balanced diet. Consider serving smaller portions or sharing with friends to keep indulgence at bay while still enjoying a delightful dessert experience.
Conclusion: The Joy of No Bake Turtle Mini Cheesecakes
Decadent No Bake Turtle Mini Cheesecakes are not only a treat for the taste buds but also an easy and rewarding dessert option for anyone looking to impress without the hassle of baking. With their creamy filling, crunchy crust, and delightful toppings, these mini cheesecakes embody the perfect balance of flavors and textures. Whether you serve them at a party or enjoy them during a quiet evening at home, these delightful bites are sure to satisfy your sweet cravings.
Embrace the joy of no-bake desserts with this simple yet decadent recipe, and enjoy every delightful bite. The combination of chocolate, caramel, and pecans creates a truly indulgent experience that will have your guests asking for seconds. So roll up your sleeves, gather your ingredients, and dive into the world of no-bake cheesecakes that promise to be a hit on any occasion!