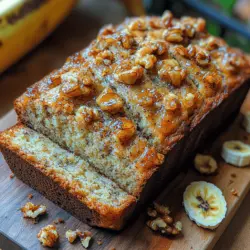
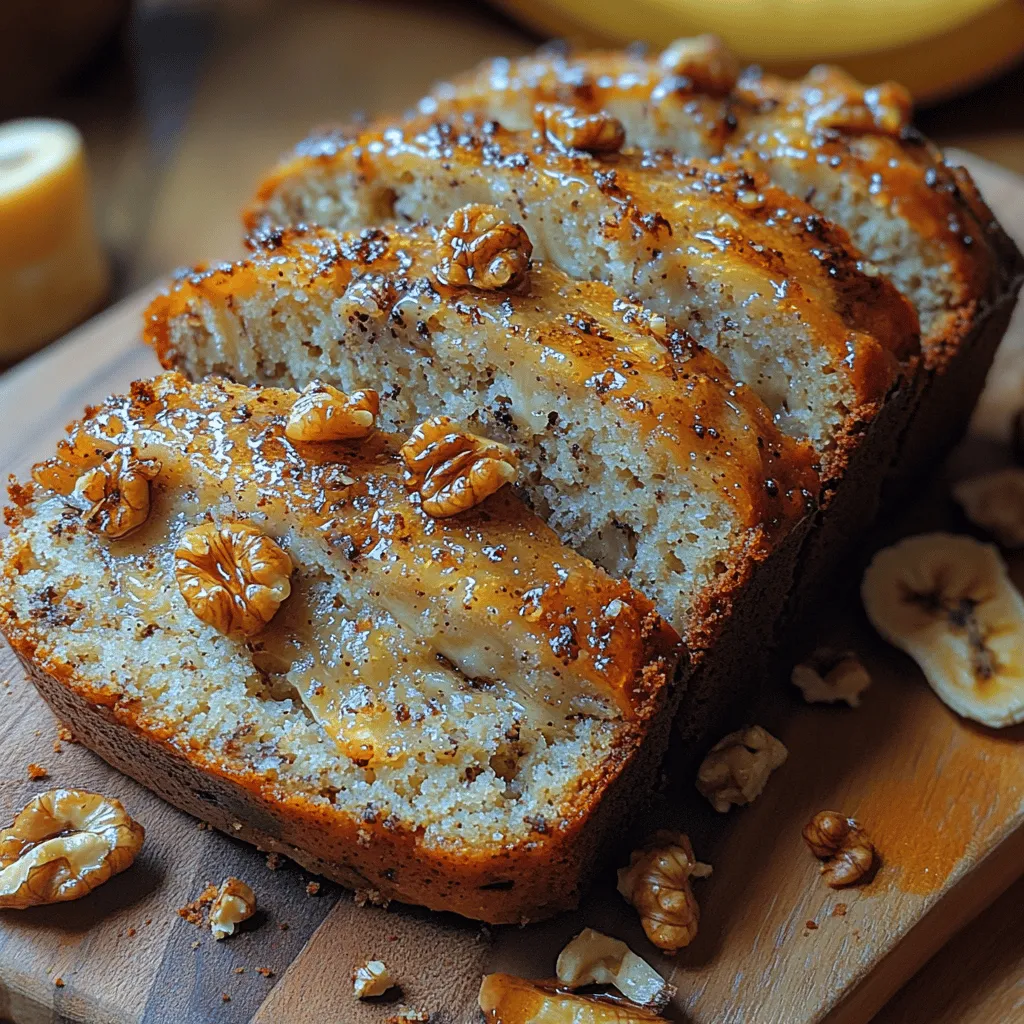
In the realm of comfort food, few treats can rival the warm, inviting aroma of freshly baked banana bread. This Heavenly Banana Bliss Bread recipe is a delightful combination of sweet, moist banana goodness, enriched with the richness of butter and the crunch of walnuts or the decadence of chocolate chips. Not only is it simple to make, but it also transforms overripe bananas into a luscious loaf that is perfect for breakfast, snacks, or dessert. Join us as we explore the ingredients, the step-by-step process, and the delightful variations of this beloved classic.
Understanding the Ingredients
The success of any recipe lies in the quality and the role of its ingredients. Let’s delve into what makes each component of this Heavenly Banana Bliss Bread essential.
Ripe Bananas
The star ingredient of this recipe is undoubtedly the ripe bananas. When choosing bananas for your bread, it’s ideal to select those that are overripe, as they are naturally sweeter and provide the moisture necessary for a tender loaf. The more brown spots on the bananas, the better! This natural sweetness means you can often reduce the amount of added sugar, making the bread healthier without sacrificing flavor.
Unsalted Butter
Butter adds richness and depth of flavor to the bread. Using unsalted butter allows you to control the sodium content of your recipe. The fat in butter also contributes to the loaf’s moist texture, creating a tender crumb that melts in your mouth. For those who prefer a dairy-free option, you can substitute with coconut oil or a plant-based butter alternative.
Granulated and Brown Sugar
A combination of granulated sugar and brown sugar enhances the flavor profile of your banana bread. Granulated sugar provides sweetness, while brown sugar adds a hint of caramel flavor thanks to its molasses content. This combination not only sweetens the bread but also contributes to its rich, golden color.
Eggs
Eggs serve as a binder in the recipe, providing structure and stability to the loaf. They also help with leavening, giving the banana bread a light, airy texture. For a vegan alternative, you can replace each egg with a flaxseed meal or chia seed mixture, which works well to bind the ingredients without compromising the flavor.
Vanilla Extract
A splash of vanilla extract enhances the flavor and aroma of the bread, bringing all the ingredients together. It’s a simple addition that can elevate the overall taste of your banana bliss bread to new heights.
Baking Soda
Baking soda acts as a leavening agent, helping the bread rise and creating a fluffy texture. Make sure your baking soda is fresh; expired baking soda can lead to a dense loaf that doesn’t rise properly.
All-Purpose Flour
All-purpose flour is the backbone of this recipe, providing the necessary structure and stability for the bread. While all-purpose flour is ideal, you can experiment with whole wheat flour or gluten-free options for a healthier twist. Just keep in mind that the texture and flavor may vary slightly.
Optional Add-Ins
To make this banana bread your own, consider adding optional ingredients such as chopped walnuts for a satisfying crunch or chocolate chips for a decadent touch. These add-ins can be adjusted based on your preferences or what you have on hand, making this recipe incredibly versatile.
Step-by-Step Guide to Making Heavenly Banana Bliss Bread
Now that we’ve covered the ingredients, let’s prepare to bring this delightful banana bread to life with a detailed, step-by-step guide.
Prepping Your Kitchen for Success
Before diving into the baking process, it’s essential to gather your ingredients and ensure you have all the necessary tools at hand. This will make your baking experience much smoother and more enjoyable.
Gathering Your Ingredients
Here’s a quick rundown of what you’ll need:
– 3 to 4 ripe bananas (about 1 ½ cups when mashed)
– ½ cup unsalted butter, melted
– ½ cup granulated sugar
– ½ cup brown sugar
– 2 large eggs
– 1 teaspoon vanilla extract
– 1 teaspoon baking soda
– 1 ½ cups all-purpose flour
– Optional: ½ cup chopped walnuts or chocolate chips
Essential Tools and Equipment Needed
To make the baking process seamless, gather the following tools:
– Mixing bowls (large and medium)
– A fork or potato masher (for mashing bananas)
– A whisk or electric mixer (for mixing ingredients)
– Measuring cups and spoons
– A loaf pan (9×5-inch is ideal)
– Parchment paper (optional, for easy removal)
– An oven thermometer (to ensure accurate temperature)
Mixing the Batter with Care
With your ingredients and tools ready, it’s time to start mixing the batter. Following these steps will ensure your banana bliss bread turns out perfectly every time.
Preparing the Oven and Loaf Pan
Begin by preheating your oven to 350°F (175°C). This temperature is optimal for baking banana bread, allowing it to rise beautifully while developing a golden crust. While the oven is heating, prepare your loaf pan by greasing it with butter or non-stick spray. For added ease in removing the bread, consider lining the bottom with parchment paper.
The Importance of Proper Banana Mashing
The first step in mixing your batter is to properly mash the ripe bananas. Place the bananas in a large mixing bowl and use a fork or potato masher to break them down until they are smooth with some small chunks remaining. This texture contributes to the overall moisture and flavor of your bread. Aim for about 1 ½ cups of mashed bananas, which usually requires 3 to 4 medium-sized ripe bananas.
Combining Wet Ingredients for Maximum Flavor
Once your bananas are mashed, it’s time to add the wet ingredients. Pour in the melted unsalted butter, followed by the granulated sugar and brown sugar. Whisk these ingredients together until they are well combined and creamy. Next, add the eggs and vanilla extract, mixing until everything is fully incorporated. The goal is to create a uniform mixture that is smooth and flavorful.
Mixing Dry Ingredients: Key Techniques for Success
In a separate medium bowl, combine the all-purpose flour and baking soda. It’s essential to whisk these dry ingredients together to ensure the baking soda is evenly distributed throughout the flour. This prevents any clumps of baking soda that could lead to uneven rising.
The Art of Mixing: Avoiding Overmixing
Now that you have both wet and dry ingredients prepared, it’s time to combine them. Gently fold the dry mixture into the wet mixture using a spatula or wooden spoon. Be careful not to overmix; a few lumps are perfectly fine. Overmixing can lead to a dense loaf, so use a light hand until just combined. If you’re adding optional ingredients like walnuts or chocolate chips, fold them in at this stage for even distribution throughout the batter.
With your batter mixed to perfection, you’re now ready to move on to the next steps in creating your Heavenly Banana Bliss Bread. The enticing aroma and the anticipation of indulging in this moist, flavorful loaf will surely make this baking experience a memorable one. Stay tuned for the next part, where we will continue with baking tips and finishing touches to ensure your banana bread turns out beautifully every time.
Baking to Perfection
Pouring the Batter and Smoothing the Top
Once your banana bread batter is ready, the next step is to pour it into your prepared loaf pan. Make sure to scrape down the sides of your mixing bowl to ensure none of the delicious mixture goes to waste. Pour the batter into the center of the pan, allowing it to spread out naturally. Using a spatula, gently smooth the top of the batter to create an even surface. This not only helps in achieving an aesthetically pleasing loaf but also ensures even baking.
Understanding Baking Times and Temperature
Your oven should be preheated to 350°F (175°C), ensuring that your banana bread begins cooking immediately upon being placed inside. While most recipes suggest a baking time of 50 to 60 minutes, it’s essential to remember that oven temperatures can vary. Keep an eye on your bread as it bakes, and use the suggested time as a guideline rather than a strict rule. Begin checking for doneness around the 50-minute mark, as overbaking can lead to a dry loaf.
Knowing When Your Bread is Ready: The Toothpick Test
To check if your Heavenly Banana Bliss Bread is fully baked, employ the toothpick test. Insert a toothpick or a thin skewer into the center of the loaf. If it comes out clean or with a few moist crumbs clinging to it, your bread is ready. If the toothpick comes out with wet batter, give it an additional 5 to 10 minutes in the oven, checking periodically. This simple test is a reliable method to ensure your banana bread is moist yet fully cooked.
Cooling and Storing Your Banana Bread
The Right Way to Cool
Once your banana bread has finished baking, it’s crucial to let it cool properly to maintain its texture and flavor. Allow the bread to cool in the pan for about 10 to 15 minutes. This cooling period helps the bread set, making it easier to remove from the pan without breaking. After this initial cooling, carefully transfer the bread to a wire rack. Cooling on a wire rack allows air to circulate around the bread, preventing condensation that could lead to sogginess.
Cooling in the Pan vs. Wire Rack: Benefits and Best Practices
Cooling in the pan initially provides stability, but transferring to a wire rack is essential for achieving the right texture. A wire rack prevents moisture from building up underneath the bread, which can occur when the bread cools in the pan. This practice not only helps maintain the integrity of the loaf but also enhances flavor by ensuring the crust remains crisp.
Storing Your Banana Bread for Freshness
Room Temperature vs. Refrigeration
To enjoy your Heavenly Banana Bliss Bread at its best, proper storage is key. If you plan to consume the bread within a few days, wrap it in plastic wrap or aluminum foil and store it at room temperature. This method retains moisture while keeping the bread fresh. However, if you live in a particularly humid climate or if you won’t consume the bread within a few days, refrigeration may be necessary. In the fridge, your banana bread can last up to a week, but be aware that refrigeration can alter the texture, making it slightly denser.
Freezing Banana Bread: How to Do It Right
For longer storage, freezing your banana bread is an excellent option. To freeze, first ensure the bread is completely cooled. Wrap it tightly in plastic wrap or aluminum foil, followed by a layer of freezer-safe bag or container to prevent freezer burn. Properly frozen banana bread can last for up to three months. When you’re ready to enjoy your bread, simply remove it from the freezer and let it thaw in the refrigerator overnight or at room temperature for a few hours. For a warm treat, consider reheating slices in the oven or microwave.
Delicious Variations and Customizations
Exploring Flavor Enhancements
One of the joys of baking banana bread is the opportunity to customize it to your taste preferences. Here are some popular variations that can elevate your Heavenly Banana Bliss Bread to new heights.
Adding Nuts: Health Benefits and Flavor Profiles
Incorporating nuts into your banana bread not only adds texture but also boosts its nutritional profile. Walnuts and pecans are popular choices, providing a delightful crunch and nutty flavor that complements the sweetness of the bananas. Additionally, nuts are a rich source of healthy fats, protein, and fiber, making your banana bread more satisfying and nutritious.
Chocolate Chips: The Sweet Indulgence
For those with a sweet tooth, adding chocolate chips to your banana bread can create an irresistible treat. Semi-sweet, dark, or even white chocolate chips can be folded into the batter before baking. This addition introduces a decadent touch, transforming your banana bread into a dessert that can be enjoyed any time of the day.
Alternative Sweeteners: Honey, Agave, or Maple Syrup
If you’re looking to reduce refined sugars, consider using alternative sweeteners like honey, agave syrup, or maple syrup. Each of these options can impart a unique flavor to your bread while maintaining its moisture. Adjust the quantity based on your sweetness preference, keeping in mind that liquid sweeteners may require slight modifications to your batter’s consistency.
Adding Spices: Cinnamon, Nutmeg, or Cardamom for Extra Warmth
Enhancing your banana bread with spices can add warmth and depth to the flavor. Ground cinnamon is a classic addition, providing a comforting aroma and taste. Nutmeg and cardamom also work beautifully, adding a subtle complexity to the overall profile. Experimenting with these spices can lead to a signature loaf that reflects your personal taste.
Health Benefits of Banana Bread
Nutritional Insights
Banana bread is not just a delightful treat; it also offers several health benefits, primarily due to its key ingredients.
Bananas: A Source of Potassium and Fiber
Bananas are the star ingredient of this recipe, and for good reason. They are an excellent source of potassium, which is essential for heart health and proper muscle function. Additionally, bananas provide dietary fiber, promoting digestive health and helping to keep you feeling full longer. This makes your banana bread not just a sweet indulgence, but also a nutritious choice.
The Role of Nuts in Heart Health
If you choose to add nuts, you’re not only enhancing flavor but also contributing to heart health. Nuts are known to lower cholesterol levels, reduce inflammation, and support overall cardiovascular function. They provide essential fatty acids, protein, and a variety of vitamins and minerals, making your banana bread a wholesome option.
Balancing Enjoyment with Moderation
While banana bread can be a delicious and nutritious treat, it’s crucial to enjoy it in moderation. Being mindful of portion sizes can help you savor this delightful baked good without compromising your health goals. By incorporating wholesome ingredients and customizing according to your dietary needs, you can make Heavenly Banana Bliss Bread a guilt-free indulgence.
Conclusion: Embracing the Joy of Baking
Heavenly Banana Bliss Bread is more than just a recipe; it is a comforting tradition that brings joy to kitchens everywhere. Its simplicity allows for creativity and personalization, making it a staple for both novice and experienced bakers. By mastering this recipe, you not only create a delicious treat but also embrace the art of baking with love and care. Whether enjoyed warm with a pat of butter or as a sweet snack throughout the day, this banana bread is sure to become a cherished favorite in your home.
As you bake your Heavenly Banana Bliss Bread, remember that each loaf tells a story of your culinary journey. It’s an opportunity to share moments with family and friends, a chance to experiment with flavors, and a way to create lasting memories. So, gather your ingredients, preheat your oven, and let the aroma of freshly baked banana bread fill your home. Happy baking!