Introduction
Cheesecakes have long captured the hearts of dessert enthusiasts around the world with their creamy texture and rich flavors. From classic New York-style cheesecakes to innovative variations that incorporate seasonal ingredients, this versatile dessert lends itself to endless creativity. One of the most delightful fusions of flavors in the cheesecake realm is the Banana Pudding Crunch Cheesecake—a decadent treat that marries the beloved flavors of banana pudding with the smooth, rich profile of cheesecake.
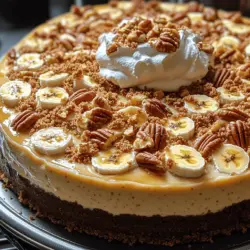
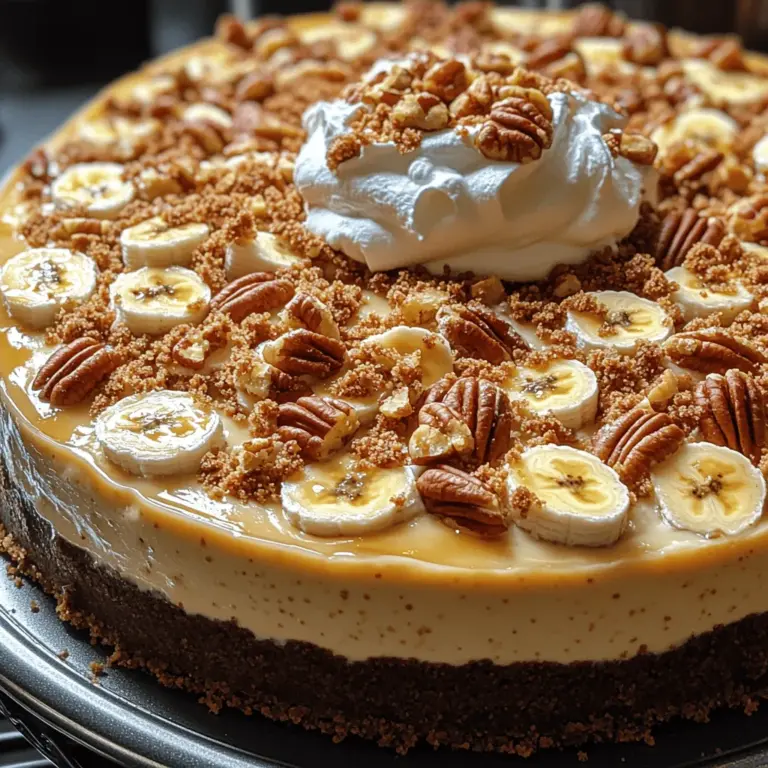
This Banana Pudding Crunch Cheesecake is not just another layer cake; it is a sensory experience that combines a buttery crust, a velvety cheesecake filling, a luscious banana pudding layer, and a crunchy topping that adds a delightful contrast in texture. Each bite offers a harmonious blend of flavors reminiscent of childhood desserts yet sophisticated enough to impress at any gathering. Whether you’re celebrating a special occasion or simply indulging in a sweet craving, this cheesecake promises to be a showstopper.
Understanding the Ingredients
To create a truly exceptional Banana Pudding Crunch Cheesecake, understanding the role of each ingredient is crucial. Here’s a detailed look at the components that come together to create this delightful dessert.
The Crust
The foundation of any great cheesecake begins with a well-made crust. In this recipe, vanilla wafer cookies serve as the primary ingredient. Their subtle sweetness and vanilla flavor perfectly complement the rich filling. When crushed and combined with melted butter and sugar, they form a crumbly mixture that, once baked, provides a firm base for the cheesecake. The butter not only binds the crumbs together but also adds a rich flavor that enhances the overall taste profile.
The Cheesecake Filling
The heart of this dessert lies in its creamy cheesecake filling. Made primarily with cream cheese, this ingredient is essential for achieving that signature smooth texture. Cream cheese contributes a rich, tangy flavor that balances the sweetness of the other components. Sugar is added to sweeten the mixture, and ripe bananas are incorporated to bring a natural sweetness and fruity essence. The bananas not only infuse flavor but also contribute to the overall creaminess of the filling, making each slice incredibly indulgent.
The Banana Pudding Layer
To elevate the cheesecake experience, a layer of banana pudding is added. This layer is typically made using a packaged pudding mix, which simplifies the process and ensures a consistent, smooth texture. When prepared according to package instructions, the pudding adds a creamy, luscious layer that enhances the banana flavor. To elevate this layer further, whipped topping is folded in, creating a light and airy texture that contrasts beautifully with the dense cheesecake filling.
The Crunch Topping
Finally, the crunch topping is what sets this cheesecake apart. It consists of crushed vanilla wafers and pecans mixed with a touch of butter, creating a topping that is both crunchy and flavorful. The addition of pecans not only provides a nutty taste but also adds another layer of texture that enhances the overall eating experience. This topping is sprinkled generously over the banana pudding layer, giving it a delightful crunch that complements the creamy layers beneath.
Preparation Steps in Detail
Creating the Banana Pudding Crunch Cheesecake involves several key steps, each crucial for achieving the perfect balance of flavors and textures. Here’s an in-depth look at each preparation step for clarity and precision.
Preparing the Crust
To start, preheat your oven to 350°F (175°C). While the oven is heating, prepare the crust by crushing approximately two cups of vanilla wafer cookies into fine crumbs. You can do this using a food processor for ease, or by placing the cookies in a zip-top bag and rolling a rolling pin over them until finely crushed.
In a medium bowl, combine the cookie crumbs with ½ cup of melted butter and ¼ cup of sugar. Mix until the crumbs are evenly coated and resemble wet sand. Press the mixture firmly into the bottom of a 9-inch springform pan, ensuring it is evenly distributed and firmly packed to create a solid base. This step is crucial; a well-pressed crust will hold its shape and provide a stable foundation for the cheesecake.
Once the crust is prepared, place it in the preheated oven and bake for about 8-10 minutes, or until it is lightly golden. Remove it from the oven and allow it to cool while you prepare the cheesecake filling.
Making the Cheesecake Filling
For the cheesecake filling, start by bringing your cream cheese to room temperature to ensure easy mixing. In a large mixing bowl, beat 16 ounces of softened cream cheese with an electric mixer on medium speed until smooth and creamy, about 2-3 minutes. Gradually add ¾ cup of granulated sugar, continuing to beat until the mixture is well combined and smooth.
Next, add in two ripe bananas, mashed until smooth. This addition not only enhances the flavor but also helps create a creamier texture. Continue mixing until the bananas are fully incorporated into the cream cheese mixture.
Once combined, add three large eggs, one at a time, mixing on low speed after each addition just until blended. Avoid overmixing at this stage, as this can incorporate too much air into the batter, causing the cheesecake to crack during baking.
After the eggs are incorporated, pour the cheesecake filling over the cooled crust in the springform pan, spreading it evenly with a spatula. This layer sets the stage for the banana pudding, so take care to create a smooth surface.
Assembling the Cheesecake
Following the preparation of the cheesecake filling, the next step is to bake the cheesecake itself. Place the springform pan in the oven and bake at 325°F (160°C) for approximately 50-60 minutes or until the edges are set and the center is slightly jiggly. It’s essential not to overbake the cheesecake; it should continue to firm up as it cools.
Once baked, turn off the oven and crack the oven door, allowing the cheesecake to cool in the oven for about an hour. This gradual cooling process helps prevent cracking. After an hour, remove the cheesecake from the oven and let it cool to room temperature before refrigerating it for at least four hours or overnight. Chilling the cheesecake allows it to firm up and develop its flavors.
Preparing the Banana Pudding Layer
While the cheesecake is chilling, it’s time to prepare the banana pudding layer. In a medium mixing bowl, combine one package of instant banana pudding mix with two cups of cold milk. Whisk vigorously for about two minutes until the mixture thickens. Once thickened, gently fold in one container (8 ounces) of whipped topping until fully combined. This lightens the pudding and adds a delightful creaminess.
Once the cheesecake has chilled and set, carefully spread the banana pudding layer over the cheesecake, ensuring it covers the surface evenly. This layer adds a luscious creaminess that perfectly complements the rich cheesecake beneath.
Crafting the Crunch Topping
The final touch to your Banana Pudding Crunch Cheesecake is the crunchy topping. In a medium bowl, combine one cup of crushed vanilla wafers and half a cup of chopped pecans. Drizzle in ¼ cup of melted butter and mix until the crumbs are evenly coated.
Sprinkle the crunchy mixture liberally over the banana pudding layer, ensuring that it covers the entire surface. This topping not only adds texture but also enhances the flavor profile, creating a delightful contrast to the creamy layers.
Incorporating these steps will elevate your Banana Pudding Crunch Cheesecake to new heights, ensuring that every bite is a harmonious blend of flavors and textures. As you embark on this baking adventure, remember that patience and attention to detail are key to achieving a stunning dessert that will impress your family and friends.
Importance of Room Temperature Ingredients
When preparing the Banana Pudding Crunch Cheesecake, the temperature of your ingredients plays a crucial role in achieving the perfect texture and flavor. Room temperature ingredients, particularly cream cheese, eggs, and sour cream, blend together more smoothly, creating a light and creamy cheesecake batter. Cold ingredients can lead to lumps and a dense texture, which we want to avoid for the best possible outcome. To bring your ingredients to room temperature, simply remove them from the refrigerator about 30 to 60 minutes before you start mixing. This small step will significantly enhance the creaminess of your cheesecake and lead to a smoother, more enjoyable final product.
How to Prevent Cracks in the Cheesecake and Ensure Even Baking
Cracks in a cheesecake can be a common issue, but with a few preventative measures, you can achieve a flawless surface. Firstly, avoid overmixing the batter, as incorporating too much air will lead to a puffed-up cheesecake that may crack as it cools. Instead, mix the ingredients just until combined.
Baking your cheesecake in a water bath can also help regulate the temperature around the cheesecake, ensuring that it bakes evenly. To create a water bath, wrap the bottom of your springform pan tightly in aluminum foil to prevent leaks, then place the pan in a larger baking dish filled with hot water. This method helps maintain moisture in the oven, reducing the likelihood of cracks.
Lastly, once the cheesecake is finished baking, turn off the oven and crack the door open, allowing the cheesecake to cool gradually. This gradual temperature change can reduce the risk of cracks forming as the cheesecake cools down.
Best Practices for Cooling and Chilling to Enhance Flavor and Texture
After baking, cooling the cheesecake properly is essential for developing its flavor and texture. Once you’ve turned off the oven and cracked the door, let the cheesecake cool in the oven for about an hour. This gradual cooling process helps prevent sudden temperature changes that could cause cracks.
After the initial cooling period, carefully remove the cheesecake from the water bath and let it cool completely at room temperature for an additional 1 to 2 hours. Once it has cooled, transfer it to the refrigerator to chill for at least 4 hours, though overnight chilling is ideal. Chilling not only enhances the flavors, allowing them to meld beautifully, but it also helps the cheesecake set properly, making it easier to slice and serve.
Flavor Profiles and Pairings
The Banana Pudding Crunch Cheesecake combines the rich, creamy texture of the cheesecake with the nostalgic flavors of banana pudding. The banana flavor is complemented by the buttery crunch of the crust, which adds a delightful contrast to the smooth cheesecake. The addition of vanilla in the cheesecake and the whipped topping brings a warm, aromatic quality that enhances the overall taste.
To elevate your dessert experience, consider pairing this luscious cheesecake with beverages that complement its flavors. A robust cup of coffee, whether black or with a splash of cream, can cut through the richness of the cheesecake and enhance its flavors. Alternatively, a soothing cup of chai or herbal tea can provide a lovely balance with its warm spices. If you prefer something more indulgent, a glass of dessert wine or a sweet Moscato can bring out the banana and vanilla notes beautifully.
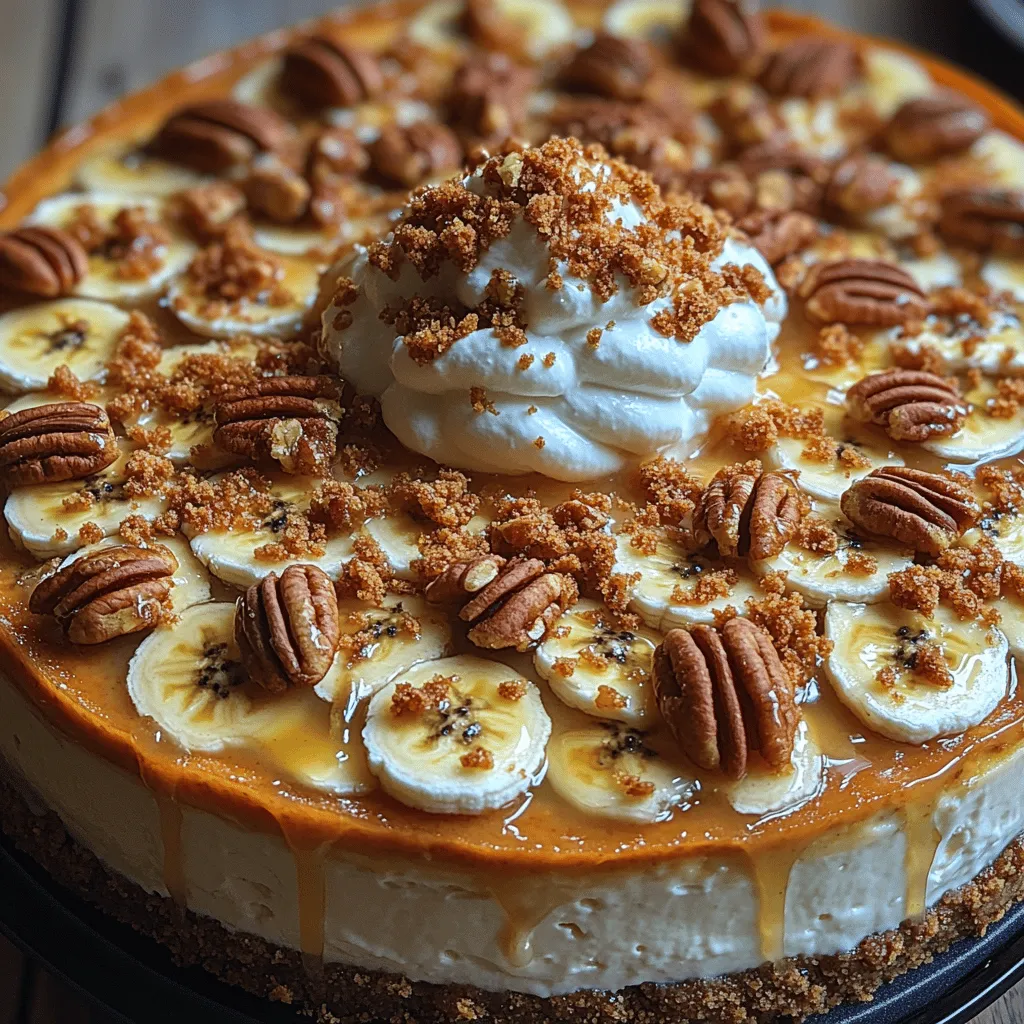
For garnishing or serving, consider topping the cheesecake with sliced fresh bananas, drizzling it with caramel sauce, or adding a sprinkle of crushed vanilla wafers for added texture and visual appeal. These finishing touches not only enhance the flavor but also make for an eye-catching presentation.
Nutritional Information
Understanding the nutritional content of your Banana Pudding Crunch Cheesecake is key to enjoying it mindfully. A typical slice (1/12 of the cheesecake) can contain approximately 350 calories, with about 22 grams of fat and 30 grams of carbohydrates. While this dessert is indulgent, it is important to keep portion control in mind. Enjoying a smaller slice can allow you to savor the flavors without overindulging.
Additionally, consider balancing indulgence with health by incorporating fresh fruit on the side, such as berries or slices of kiwi, to add natural sweetness and fiber. This way, you can enjoy the richness of the cheesecake while still being mindful of your overall dietary habits.
Serving Suggestions
When it comes to presenting your Banana Pudding Crunch Cheesecake, creativity can enhance the dining experience. For a stunning display, consider placing the cheesecake on a decorative cake stand. You can also add a layer of whipped cream around the edges for a touch of elegance. For an extra pop, garnish with banana slices and a sprinkle of crushed vanilla wafers or nuts for a textured look.
This cheesecake is a perfect centerpiece for various occasions. It shines at birthday celebrations, where its delightful flavors can bring joy to guests of all ages. At holiday gatherings, it can serve as a comforting dessert that evokes nostalgia. For potlucks or family gatherings, its crowd-pleasing appeal makes it an excellent choice, ensuring that everyone leaves with a satisfied sweet tooth.
Storing and Reheating
To maintain the freshness and flavor of your Banana Pudding Crunch Cheesecake, proper storage is essential. If you have leftovers, cover the cheesecake with plastic wrap or aluminum foil, or store it in an airtight container to prevent it from absorbing any odors from the refrigerator. The cheesecake can be kept in the fridge for up to 5 days.
If you wish to freeze the cheesecake for longer storage, slice it into individual pieces and wrap each slice tightly in plastic wrap followed by aluminum foil. This method will help preserve its flavor and texture. When you’re ready to enjoy a slice, simply transfer it to the refrigerator to thaw overnight. Avoid reheating the cheesecake in the microwave, as this can affect its creamy texture. Instead, let it come to room temperature for the best flavor experience.
Conclusion
Making and enjoying Banana Pudding Crunch Cheesecake is not just about satisfying a sweet craving; it’s about creating a delightful experience filled with flavor and nostalgia. The combination of creamy cheesecake with the familiar taste of banana pudding, paired with a crunchy crust, makes this dessert a favorite among many.
Don’t hesitate to explore variations of the recipe based on your personal taste preferences, such as adding chocolate chips for a decadent twist or incorporating different fruits for seasonal flair. Baking and sharing desserts like this with loved ones is a wonderful way to create lasting memories and foster connections. Embrace the joy of baking, and let your creativity shine as you bring this delicious cheesecake to life!