Introduction to Zesty Cauliflower Pizza Crust
Pizza is a beloved dish enjoyed by many across the globe, often seen as a go-to comfort food. However, traditional pizza crusts made from refined flour can be heavy and high in carbohydrates, leading some health-conscious eaters to seek alternatives. This is where the zesty cauliflower pizza crust comes into play—a delicious and nutritious option that satisfies pizza cravings without the guilt.
Cauliflower pizza crust has gained immense popularity in recent years, especially among those following low-carb, gluten-free, or keto diets. The versatility of cauliflower allows it to be transformed into a pizza base that is not only healthier but also gluten-free, making it an ideal choice for individuals with gluten sensitivities or those looking to reduce their carbohydrate intake. The best part? You can customize it to suit your taste preferences, making it a fun and engaging cooking experiment.
In this article, we will delve into the details of making a zesty cauliflower pizza crust from scratch, providing you with a step-by-step guide that ensures you achieve a crispy, flavorful base for your favorite toppings. From the selection of fresh ingredients to crafting the perfect crust, we’ll cover everything you need to know to elevate your homemade pizza experience.
Understanding the Ingredients for Zesty Cauliflower Pizza Crust
Creating the perfect zesty cauliflower pizza crust starts with a careful selection of ingredients. Each component plays a crucial role in the texture and flavor of the final product. Here’s a breakdown of the key ingredients you’ll need:
Cauliflower: The Star Ingredient
The primary ingredient in this pizza crust is, of course, cauliflower. Choosing fresh, high-quality cauliflower is essential for achieving the right texture. You can use either a whole head of cauliflower or pre-riced cauliflower, which can save time. When shopping for cauliflower, look for firm, compact heads with no dark spots or blemishes. Fresh cauliflower will yield better moisture control and flavor.
Cheese: Binding and Flavor
Cheese not only adds flavor but also helps bind the crust together. The most commonly used cheese in cauliflower pizza crust recipes is mozzarella due to its gooey, melty characteristics. However, feel free to experiment with other cheeses like parmesan or cheddar for added flavor. Using a combination can also enhance the crust’s taste and texture.
Eggs: The Binding Agent
Eggs serve as an essential binding agent in the cauliflower pizza crust, helping to hold the ingredients together and give the crust structure. When selecting eggs, opt for large, fresh eggs, as their size and freshness will influence the moisture content of your crust.
Seasonings: Adding Zest and Flavor
To enhance the flavors of your cauliflower pizza crust, a variety of seasonings can be used. Common choices include garlic powder, onion powder, dried oregano, and red pepper flakes for a kick of heat. Salt and pepper are also essential for balancing flavors. You can customize your seasoning blend based on your personal preferences or the toppings you plan to use.
Optional Add-Ins: Taking It to the Next Level
For an added zesty touch, consider mixing in fresh or dried herbs such as basil or parsley. These add not only flavor but also a burst of color to your crust. Additionally, some recipes recommend incorporating nutritional yeast for a cheesy flavor without the dairy, making it ideal for vegan adaptations.
Preparing the Cauliflower for the Pizza Crust
Once you have gathered your ingredients, the next step is to prepare the cauliflower. This process is crucial for achieving the perfect texture and ensuring that your crust is not too soggy. Here’s how to prepare your cauliflower:
Step 1: Ricing the Cauliflower
Begin by removing the leaves and stem from the head of cauliflower. Cut it into smaller florets to make it easier to process. If you have a food processor, add the florets and pulse until they resemble rice or small grains. If you don’t have a food processor, you can use a box grater for the same effect. Ricing the cauliflower is an essential step, as it creates the foundation for your crust.
Step 2: Cooking the Cauliflower
To remove excess moisture from the riced cauliflower, it needs to be cooked. You have a couple of options here:
– Steaming: Place the riced cauliflower in a steamer basket over boiling water. Cover and steam for about 5-7 minutes until tender. Avoid overcooking, as this can lead to a mushy crust.
– Microwaving: Alternatively, you can microwave the riced cauliflower in a microwave-safe bowl for about 5-6 minutes. Cover with a damp paper towel to help steam it. Again, be cautious not to overcook.
After cooking, allow the cauliflower to cool slightly before proceeding to the next step.
Step 3: Squeezing Out Excess Moisture
This step is crucial for a crispy pizza crust. Once the cooked cauliflower is cool enough to handle, transfer it to a clean kitchen towel or cheesecloth. Gather the edges of the towel and twist it to squeeze out as much moisture as possible. This may take some effort, but a drier mixture will result in a better texture for your crust.
Step 4: Mixing with Cheese and Seasonings
In a large mixing bowl, combine the riced and drained cauliflower with shredded mozzarella cheese, eggs, and your selected seasonings. Mix well until all ingredients are evenly incorporated. The mixture should be somewhat sticky but not overly wet. If it feels too wet, you may need to add more cheese or a tablespoon of almond flour to help absorb the moisture.
Cooking the Cauliflower Pizza Crust
Now that your dough is prepared, it’s time to shape and bake your crust. The cooking method is essential for achieving that desired crispiness. Here’s how to do it:
Step 1: Preheat the Oven
Preheat your oven to 425°F (220°C). A hot oven is key to achieving a crispy crust, so allow sufficient time for it to reach the desired temperature.
Step 2: Prepare the Baking Sheet
To prevent sticking and to make cleanup easier, line a baking sheet with parchment paper. You can also lightly grease the parchment with olive oil for added flavor and to ensure easy removal of the crust after baking.
Step 3: Shape the Crust
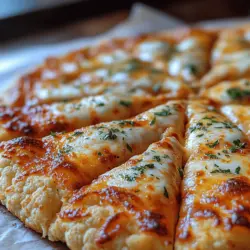
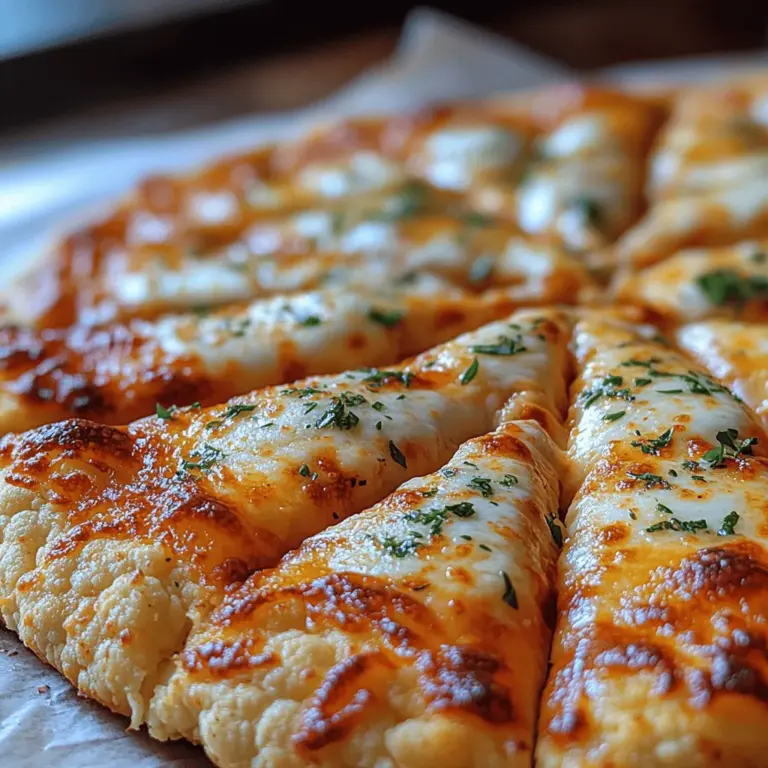
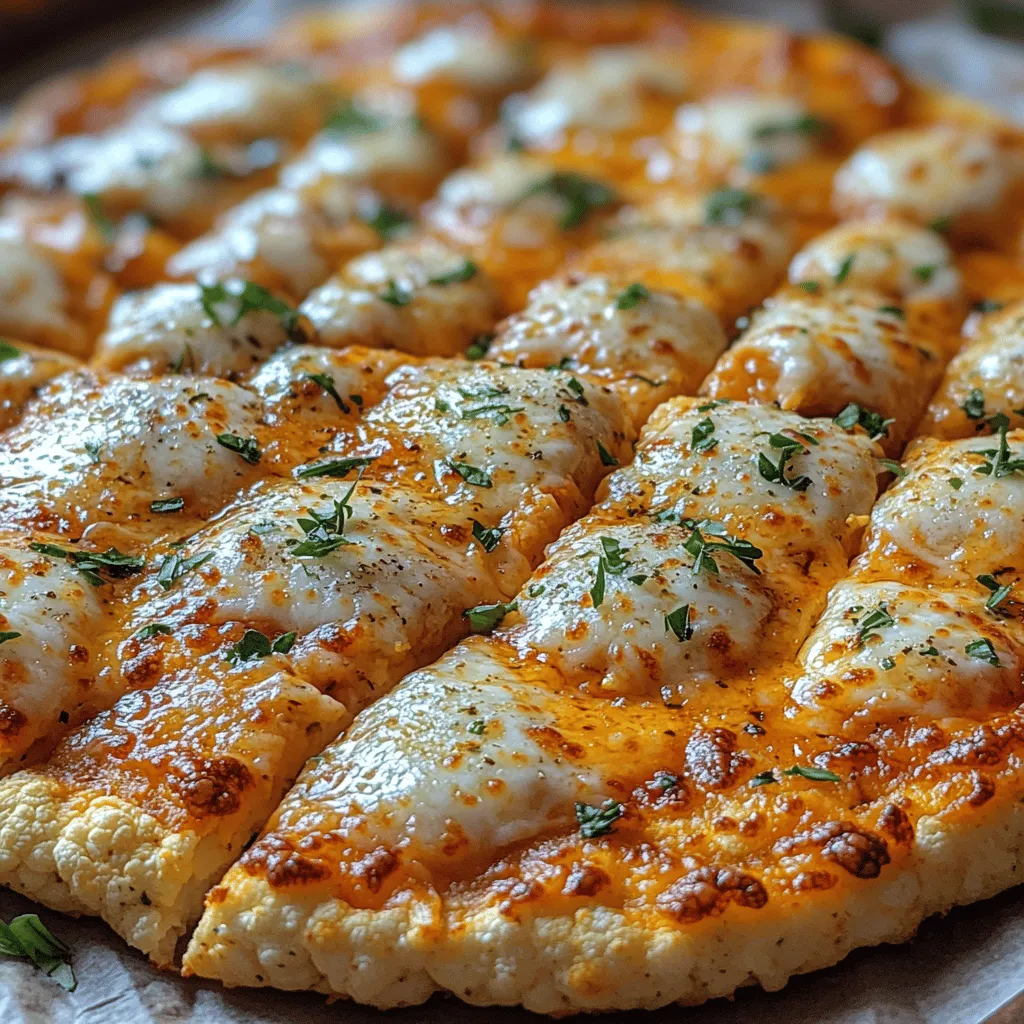
Transfer the cauliflower mixture onto the prepared baking sheet. Using your hands or a spatula, spread the mixture into a circular shape, about ¼ inch thick. Try to create a uniform thickness to ensure even cooking. The edges can be slightly thicker if you prefer a crust with a little more bite.
Step 4: Bake the Crust
Once shaped, place the baking sheet in the preheated oven and bake for 20-25 minutes, or until the crust is golden brown and firm to the touch. Keep an eye on it during the last few minutes of baking to prevent burning.
Step 5: Let It Cool
After baking, remove the crust from the oven and allow it to cool for a few minutes. This step is important, as it helps the crust firm up further, making it easier to add toppings without compromising its structural integrity.
At this point, your zesty cauliflower pizza crust is ready for your favorite toppings, whether you prefer a classic margherita, a loaded veggie pizza, or a meat lover’s dream. The versatility of this crust means that you can get creative with flavors and ingredients, making it a delightful addition to your meal rotation.
In the next part of this article, we will delve into crafting the perfect toppings for your cauliflower pizza, ensuring that every bite is bursting with flavor. Stay tuned as we explore the endless possibilities that await you in the world of cauliflower pizza!
Melting Butter and Sautéing Garlic: Building Flavor
To kick off your Zesty Cauliflower Pizza Crust, the first step involves melting butter and sautéing garlic, which serves as the foundation for flavor development. Begin by adding about 2 tablespoons of unsalted butter to a medium saucepan over medium heat. As the butter begins to melt, watch for it to become frothy, indicating that it’s ready for the next step.
Once the butter is fully melted, toss in 2-3 cloves of minced garlic. Sauté the garlic for about 1-2 minutes until it becomes fragrant and lightly golden. It’s essential to keep an eye on it during this process, as burnt garlic can impart a bitter taste to your dish. This step not only enhances the flavor profile of your cauliflower crust but also sets a delicious tone for the rest of your pizza.
Adding Heavy Cream and Simmering Techniques
Next, it’s time to elevate your sauce by introducing heavy cream. Pour in 1 cup of heavy cream into the saucepan with the sautéed garlic and butter. Stir well to combine the ingredients, allowing the cream to absorb the flavors of the garlic and butter. Bring the mixture to a gentle simmer. It’s crucial to keep the heat moderate to avoid boiling, which could cause the cream to curdle.
Let the cream simmer for about 5-7 minutes, allowing it to thicken slightly. This simmering technique will help concentrate the flavors and create a rich, velvety base for your pizza. Be sure to stir occasionally to prevent the cream from sticking to the bottom of the pan.
The Art of Incorporating Parmesan Cheese for the Perfect Texture
With your creamy base simmered to perfection, it’s time to introduce the star ingredient: Parmesan cheese. As you remove the saucepan from the heat, slowly whisk in 1 cup of freshly grated Parmesan cheese. The cheese will melt beautifully into the cream, creating a luxurious, cheesy sauce that will cling to your cauliflower crust.
For the best texture, make sure to use freshly grated cheese rather than pre-packaged, as it tends to have anti-caking agents that can affect melting. Continue to stir until all the cheese is fully incorporated into the sauce, creating a smooth and creamy consistency. If the sauce seems too thick, you can add a splash of milk or additional cream to reach your desired consistency.
Adjusting Seasoning for the Ideal Taste
To ensure your sauce is bursting with flavor, it’s essential to adjust the seasoning. Sprinkle in salt and freshly ground black pepper to taste, and consider adding a pinch of nutmeg for an extra layer of depth. Nutmeg pairs exceptionally well with creamy sauces, enhancing the overall flavor profile.
Taste the sauce as you adjust the seasoning, aiming for a perfect balance that complements the richness of the cheese and cream. Once satisfied, set the sauce aside as you prepare to combine the remaining components of your Zesty Cauliflower Pizza.
Combining Chicken, Pasta, and Sauce
Now, let’s focus on combining the chicken, cauliflower crust, and cheesy sauce to create a harmonious dish. Begin by cooking your chicken breast—about 1 pound—seasoned lightly with salt and pepper. You can grill, bake, or sauté the chicken. Once cooked through, allow it to rest for a few minutes before slicing it into bite-sized pieces.
For those who prefer a heartier meal, you may also choose to prepare a side of pasta. Cook about 8 ounces of your preferred pasta according to package instructions until al dente. Reserve about 1 cup of the pasta cooking water before draining, as this will be useful for achieving the desired sauce consistency later on.
Techniques for Marrying the Components Smoothly
In a large mixing bowl, combine the cooked chicken and pasta with the creamy Parmesan sauce. Stir gently to ensure that every piece is coated with the sauce. If the mixture appears too thick, gradually add the reserved pasta water, stirring until you achieve a creamy consistency that clings to the ingredients without being overly runny.
The Role of Reserved Pasta Water in Achieving the Desired Consistency
The reserved pasta water is a game-changer in this recipe. It contains starch that helps emulsify the sauce, allowing it to adhere beautifully to the chicken and pasta. This method not only enhances the texture but also helps to prevent the dish from becoming dry. Always start with a small amount of pasta water, adding more as needed until you reach the perfect creaminess.
Tips for Serving Immediately to Maintain Creaminess
To enjoy the full richness of your Zesty Cauliflower Pizza Crust, serve the dish immediately after combining the components. The longer it sits, the thicker the sauce may become, potentially losing its desirable creamy texture.
When serving, consider using warm plates to help maintain the dish’s temperature. If you need to hold the dish for a few minutes before serving, keep it covered on low heat and stir occasionally.
Serving Suggestions for Chicken Alfredo
Now that your dish is ready, consider how to elevate your presentation and dining experience. Plating techniques can significantly enhance the visual appeal of your Zesty Cauliflower Pizza.
Plating Techniques for a Restaurant-Style Presentation
Use a large, shallow bowl or plate for serving, and spoon a generous portion of the creamy chicken and pasta mixture onto the center. For a restaurant-style finish, you can twirl the pasta slightly before placing it on the plate to create height. Drizzle a little extra sauce around the edges for a professional look.
Complementary Sides: Breadsticks, Salads, or Vegetables
To round out your meal, serve with complementary sides. Garlic breadsticks are a classic choice that pairs wonderfully with creamy pasta dishes, allowing diners to soak up any extra sauce. A fresh green salad dressed with a light vinaigrette can help balance the richness of the pizza crust and sauce, offering a refreshing contrast. Alternatively, sautéed or steamed seasonal vegetables can add color and nutrition to your meal.
Garnishes that Enhance Flavor and Aesthetics: Fresh Herbs, Extra Cheese
Finishing touches can elevate your dish even further. Fresh herbs such as parsley or basil add a pop of color and a burst of flavor. Consider sprinkling additional grated Parmesan on top for an extra cheesy touch. A few cracks of black pepper or a drizzle of high-quality olive oil can also enhance the presentation and flavor profile.
Variations on the Classic Chicken Alfredo
While the Zesty Cauliflower Pizza Crust with Chicken Alfredo is delightful on its own, don’t hesitate to explore variations that can cater to different tastes and dietary preferences.
Adding Vegetables for a Healthier Twist
Incorporating vegetables into your dish not only boosts nutrition but also adds vibrant colors and flavors. Consider adding sautéed spinach, roasted red peppers, or broccoli florets. These ingredients can be mixed in before serving, allowing their flavors to meld with the creamy sauce.
Exploring Protein Alternatives: Shrimp, Salmon, or Plant-Based Options
If you’d like to switch up the protein, shrimp or salmon are excellent alternatives that can add a touch of sophistication. For a plant-based option, consider using chickpeas or tofu, seasoned and sautéed, to create a delicious vegetarian version that remains satisfying.
Experimenting with Different Pasta Types
While traditional fettuccine is often the go-to for Alfredo, feel free to experiment with different pasta shapes. Penne, fusilli, or even gluten-free pasta can provide a unique twist to your dish. Each type of pasta will capture the sauce differently, offering a new dining experience each time you make it.
Storing and Reheating Chicken Alfredo
If you find yourself with leftovers (which is often the case with such a hearty dish), knowing how to store and reheat your Zesty Cauliflower Pizza Crust properly will help maintain its quality.
Best Practices for Storing Leftovers
After enjoying your meal, allow any leftovers to cool completely before transferring them to an airtight container. Store them in the refrigerator for up to 3 days. For longer-lasting storage, consider freezing the dish in portions. When freezing, ensure that the container is suitable for the freezer to avoid freezer burn.
Tips for Reheating without Compromising Creaminess
When it comes time to reheat, do so gently to prevent the sauce from separating. A microwave is convenient, but reheating on the stovetop is preferable. Place the leftovers in a saucepan over low heat, adding a splash of milk or cream to help restore the sauce’s creaminess. Stir frequently until heated through.
Creative Ways to Repurpose Leftovers
Leftovers can be creatively repurposed into different meals. For example, you can turn the chicken Alfredo into a baked casserole by mixing it with some cooked pasta and topping it with cheese before baking until golden. Alternatively, you could use it as a filling for stuffed peppers or a creamy sauce over roasted vegetables.
Conclusion: The Joy of Homemade Chicken Alfredo
The Zesty Cauliflower Pizza Crust with Chicken Alfredo is not just a meal; it’s a celebration of flavors and textures that can be easily prepared at home. With its creamy sauce, savory chicken, and robust cauliflower crust, it appeals to a wide range of palates while remaining simple to make.
This dish invites customization, encouraging you to experiment with various ingredients and techniques to suit your tastes and dietary needs. Be it through adding vegetables, changing up the protein, or trying different pasta shapes, the possibilities are endless.
There’s a unique satisfaction that comes from creating a beloved classic at home, knowing that you’ve crafted something delicious that you and your loved ones can enjoy together. So grab your ingredients, gather your loved ones, and embark on this culinary adventure. Happy cooking!