Introduction
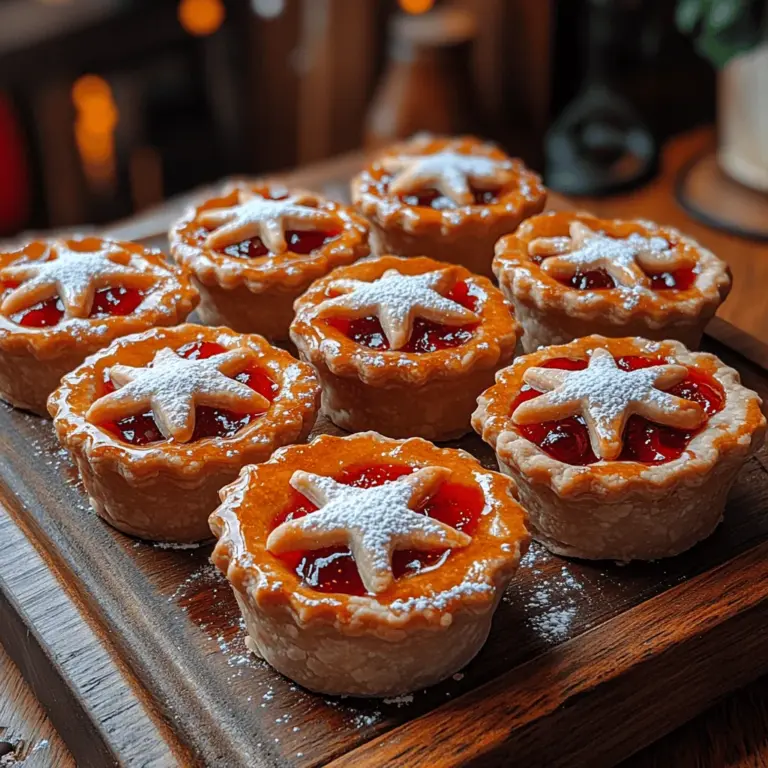
Mini pie bites are quickly becoming a must-try dessert option for any occasion. These delightful little treats offer all the charm of traditional pies but in a perfectly portioned, bite-sized format that makes them irresistibly easy to enjoy. Whether served at a summer barbecue, a holiday gathering, or simply as a sweet snack at home, mini pies are an ideal choice for those who appreciate the balance of a flaky crust and a luscious filling.
Among the myriad of flavors available, cherry stands out as a perennial favorite. The sweet and tart profile of cherries creates a delightful taste experience that dances on the palate. This seasonal fruit, with its rich color and juicy goodness, not only elevates the visual appeal of desserts but also adds a refreshing burst of flavor that’s perfect for warm-weather baking.
What makes the Cherry Bliss Mini Pie Bites even more appealing is their simplicity. This recipe is designed with the home baker in mind, catering to all skill levels. With just a few straightforward steps and readily available ingredients, you can whip up a batch of these charming mini pies in no time. Whether you’re a seasoned baker or a novice in the kitchen, this recipe will guide you through the process of creating these delightful bites that are sure to impress family and friends.
The Allure of Cherry Desserts
Cherry desserts have long been celebrated for their delightful flavor and versatility. From classic cherry pies to tarts and crumbles, the use of cherries in sweet dishes is a time-honored tradition in many cultures. Their natural sweetness, complemented by a tangy undertone, makes them an excellent choice for desserts that require a burst of flavor. Moreover, cherries are incredibly versatile and can be incorporated into a variety of dishes, making them a staple in the world of baking.
Beyond their delicious flavor, cherries also bring a host of health benefits to the table. Rich in antioxidants, vitamins C and A, and dietary fiber, cherries are not only a tasty treat but also a nutritious addition to your diet. Antioxidants are essential for combating oxidative stress in the body, which can lead to chronic diseases. Additionally, cherries have anti-inflammatory properties and may help improve sleep quality due to their natural melatonin content. Incorporating cherries into your desserts allows you to indulge while also enjoying their health benefits.
The best time to enjoy cherries is during the peak cherry season, which typically runs from late spring through early summer. During this time, fresh cherries are abundant in markets, bursting with flavor and sweetness. This seasonal availability not only influences the preparation of desserts but also enhances the overall flavor profile of the final product. When cherries are in season, using fresh fruit for your Cherry Bliss Mini Pie Bites will yield the best taste and texture.
Ingredients Breakdown
Fresh vs. Frozen Cherries
When it comes to choosing cherries for your mini pie bites, you may find yourself debating between fresh and frozen options. Fresh cherries are ideal for their sweet, juicy flavor and firm texture, making them perfect for baking. They add a vibrant color and an authentic taste to your dessert. However, fresh cherries can be seasonal and may not always be readily available, depending on your location.
On the other hand, frozen cherries provide a convenient alternative. They are picked and frozen at peak ripeness, ensuring that they retain much of their flavor and nutritional value. While frozen cherries may have a slightly softer texture when thawed, they are still an excellent choice for baking, especially when fresh fruit is not an option. Whichever you choose, make sure the cherries are pitted and ready to use for a smooth baking experience.
The Role of Granulated Sugar
Granulated sugar is an essential ingredient in the Cherry Bliss Mini Pie Bites recipe. Not only does sugar enhance the natural sweetness of the cherries, but it also plays a crucial role in balancing the tartness of the fruit. When combined with cherries, sugar helps to draw out their juices, creating a delicious filling that is both sweet and slightly tangy.
In addition to flavor enhancement, sugar contributes to the overall texture of the cherry filling. It helps to create a syrupy consistency when the cherries are cooked, ensuring that each bite is bursting with flavor. However, it’s important to use the right amount of sugar, as too little may result in a filling that is overly tart, while too much can overwhelm the cherry flavor.
Understanding Cornstarch
Cornstarch is a vital thickening agent in this mini pie recipe. When combined with the cherry juices, it creates a thick, luscious filling that holds its shape once baked. Cornstarch works by absorbing the liquid released by the cherries during cooking, transforming the mixture into a cohesive filling that doesn’t run out of the pie bites.
To achieve the perfect consistency, it’s important to mix the cornstarch with the sugar before adding it to the cherries. This prevents clumping and ensures an even distribution throughout the filling. Additionally, be mindful of the cooking time; overcooking the filling can cause it to become too thick, while undercooking may leave it runny.
The Importance of Vanilla and Lemon Juice
Vanilla extract and lemon juice are two simple yet impactful ingredients that elevate the flavor profile of your cherry filling. Vanilla adds a warm, aromatic undertone that complements the natural sweetness of the cherries, creating a more complex flavor experience. It enhances the overall taste and adds a touch of sophistication to your mini pie bites.
Lemon juice, on the other hand, contributes brightness and acidity to the filling. Just a splash of lemon juice can help balance the sweetness of the cherries, enhancing their natural flavors and preventing the filling from becoming overly sweet. The acidity from the lemon juice also works to brighten the overall flavor, giving your dessert a refreshing finish.
Overview of Pie Crust Options
When it comes to making the pie crust for your mini pie bites, you have two main options: homemade or store-bought. Each option has its pros and cons, and your choice may depend on the time you have available and your baking skill level.
Homemade pie crusts are often praised for their superior flavor and texture. By making your own crust, you can control the ingredients and ensure a perfectly flaky, buttery crust that pairs beautifully with the cherry filling. However, making pie crust from scratch can be time-consuming and may require some practice to perfect.
Store-bought pie crusts offer convenience and save you valuable time in the kitchen. They are widely available and come in various forms, including pre-rolled and ready-to-use crusts. While store-bought options may not have the same depth of flavor as homemade, they are a great solution for busy bakers looking to whip up a quick dessert without sacrificing taste.
Egg Wash Importance
An egg wash is a simple mixture of beaten egg and water or milk that is brushed onto the surface of baked goods before they go into the oven. For your Cherry Bliss Mini Pie Bites, applying an egg wash serves several purposes. It enhances the final appearance of the pies, giving them a beautiful golden-brown color and a glossy finish that is visually appealing.
In addition to aesthetics, the egg wash also helps to seal the edges of the pie crust, preventing the filling from leaking out during baking. This is particularly important for mini pies, where a secure seal ensures that each bite is filled with delicious cherry goodness without any mess. The egg wash is a small but significant step that contributes to the overall success of your mini pie bites.
Step-by-Step Instructions
Preheating the Oven
Before you begin preparing your Cherry Bliss Mini Pie Bites, the first step is to preheat your oven. Proper preheating is crucial for achieving the best baking results. Set your oven to 400°F (200°C) and allow it to heat up for at least 15-20 minutes before placing your mini pies inside. This ensures that the hot air circulates evenly, allowing the pies to bake thoroughly and develop a golden crust.
Preparing the Cherry Filling
Once your oven is preheated, it’s time to prepare the cherry filling. Start by selecting your cherries, whether fresh or frozen. If using fresh cherries, wash them thoroughly, remove the stems, and pit them. For frozen cherries, simply measure out the required amount, allowing them to thaw slightly before use.
In a mixing bowl, combine the pitted cherries with granulated sugar, cornstarch, vanilla extract, and lemon juice. Gently toss the ingredients together until the cherries are evenly coated. It’s important to take your time during this step to ensure that every cherry is infused with the sweet and tangy flavors of the filling.
As you mix, watch for the juices released by the cherries, which will start to combine with the sugar and cornstarch, creating a syrupy consistency. This mixture will be the star of your mini pie bites, so ensure that it’s well combined before moving on to the next steps.
With these initial steps complete, you are well on your way to creating your Cherry Bliss Mini Pie Bites. The combination of sweet cherries, a flaky crust, and a touch of vanilla and lemon will make these treats an unforgettable dessert option. Stay tuned for the next part, where we’ll continue with the assembly and baking process to bring these delicious bites to life.
Rolling Out the Pie Crust
To create the perfect Cherry Bliss Mini Pie Bites, the first step is rolling out the pie crust. Achieving the right thickness and texture is crucial for a tender yet sturdy base. Here’s how to do it right:
1. Chill the Dough: Before rolling, ensure your pie dough is well-chilled. This helps prevent it from becoming too soft and sticky, making it easier to handle. Refrigerate the dough for at least 30 minutes before rolling.
2. Flour the Surface: Lightly dust your work surface and rolling pin with flour to prevent sticking. Use just enough flour—too much can make the dough tough.
3. Rolling Technique: Start at the center of the dough and roll outward in all directions, turning the dough a quarter turn between rolls for an even thickness. Aim for about 1/8 inch thickness, which is ideal for mini pies. If the dough sticks, add a little more flour beneath it.
Cutting the Dough
Once your dough is rolled out, it’s time to cut it into circles for the pie bites. Here are some methods and tools to ensure uniformity:
1. Using a Cookie Cutter: A round cookie cutter or a glass can serve as an effective tool for cutting. Choose a cutter that measures about 3 to 4 inches in diameter for each mini pie bite.
2. Proper Spacing: Ensure you space the circles evenly without crowding them. This helps in utilizing the dough efficiently and reduces waste. If you find you have extra scraps, you can re-roll them, but be careful not to overwork the dough, as this can lead to toughness.
3. Precision Matters: For uniform pie bites, ensure that each piece is cut with consistent pressure to avoid jagged edges. Smooth, clean cuts will lead to a more polished final product.
Assembling the Pie Bites
With your dough circles ready, it’s time to assemble the pie bites. Proper filling and sealing techniques are vital to avoid spills during baking:
1. Filling: Place a small amount (about a teaspoon) of the cherry filling in the center of each dough circle. Be cautious not to overfill, as this can cause the filling to overflow during baking.
2. Sealing: To seal the pies, fold the dough over the filling to create a half-moon shape. Press the edges together firmly. You can use the tines of a fork to crimp the edges, ensuring a tight seal and adding a decorative touch.
3. Prevent Spills: To further prevent any leaking, you can brush a tiny bit of water along the edge of the dough before sealing. This helps the dough stick together and creates a tighter seal.
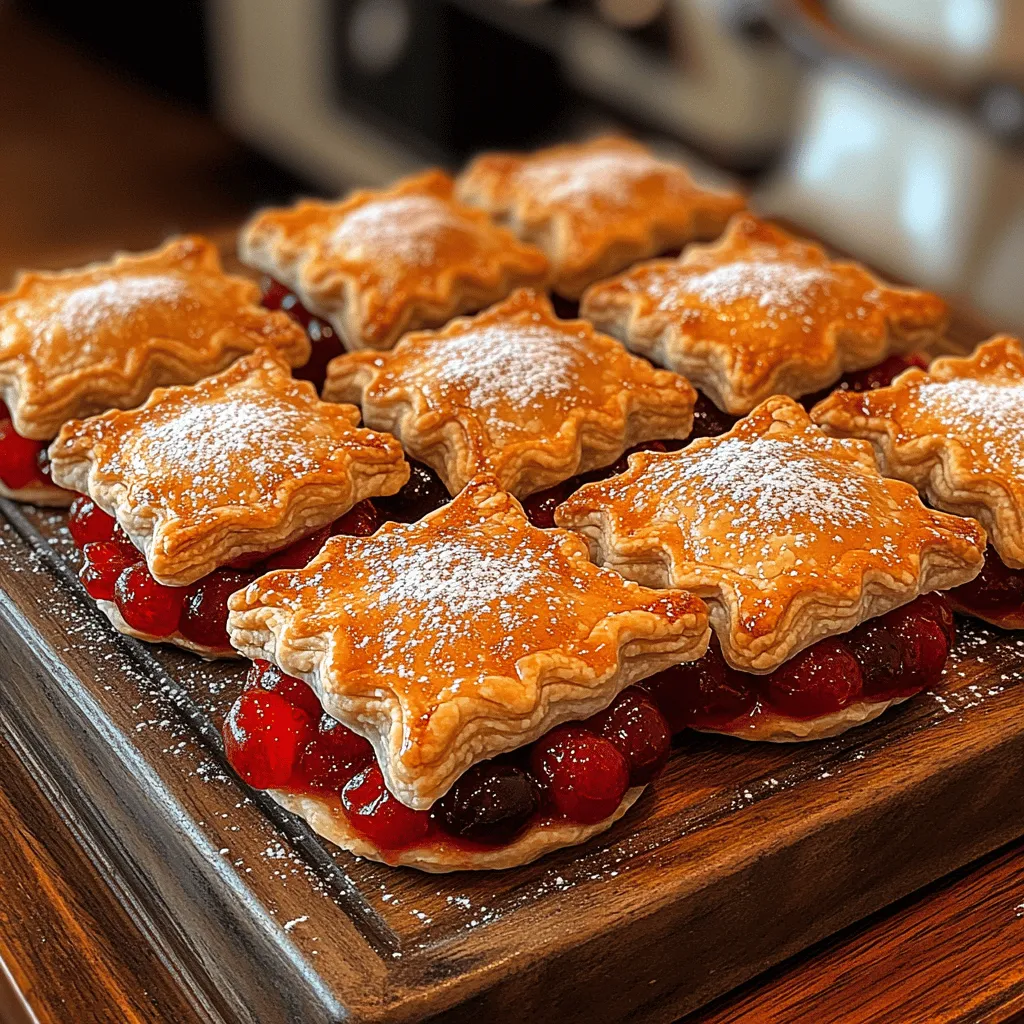
Creating Lids
For those who prefer a top crust on their mini pies, creating lids is essential. Here’s how to do it right:
1. Cutting Lids: Roll out a separate section of dough and cut circles for lids that match the base. Alternatively, you can cut strips for a lattice top if you want to get creative.
2. Venting: Venting is crucial in baked goods to allow steam to escape, preventing sogginess. If using solid lids, cut a few small slits in the top to allow steam to escape during baking. This ensures the filling stays juicy while the crust remains crisp.
Applying Egg Wash
An egg wash gives your mini pies a beautiful, golden finish. Here’s how to apply it effectively:
1. Preparing the Egg Wash: Beat one egg with a splash of milk or water to create a glossy wash. This mixture not only adds color but also enhances flavor.
2. Application Technique: Use a pastry brush to apply the egg wash gently over the tops of your pie bites. Be careful not to let it drip down the sides, as it can cause the crust to brown too quickly.
3. Even Coverage: Aim for even coverage to ensure all parts of the crust get that lovely golden hue. This step also makes the pies more visually appealing when served.
Baking Process
Getting the baking process right is essential for achieving perfect Cherry Bliss Mini Pie Bites. Follow these guidelines:
1. Preheat the Oven: Preheat your oven to 375°F (190°C). A well-preheated oven ensures the pies cook evenly.
2. Baking Time: Bake the mini pies for about 20-25 minutes or until they are golden brown and the filling is bubbling. Keep an eye on them towards the end of the baking time to avoid over-browning.
3. Signs of Readiness: Look for a crisp, golden crust and bubbling filling as indicators that your mini pies are ready. If they start to brown too quickly, you can cover them loosely with aluminum foil.
Cooling and Dusting
Once your mini pies are baked to perfection, it’s important to let them cool properly:
1. Cooling Time: Allow the Cherry Bliss Mini Pie Bites to cool on the baking sheet for about 10 minutes before transferring them to a wire rack. This cooling period helps set the filling and makes them easier to handle.
2. Presentation: After they have cooled completely, dust with powdered sugar for an elegant finish. This not only adds visual appeal but also a touch of sweetness.
Serving Suggestions
Cherry Bliss Mini Pie Bites are versatile and can be enjoyed in various ways. Here are some serving suggestions:
1. Pairing with Ice Cream or Whipped Cream: Serve warm mini pie bites with a scoop of vanilla ice cream or a dollop of freshly whipped cream. The warm cherry filling contrasts beautifully with the cold ice cream, creating a delightful dessert experience.
2. Occasion Ideas: These mini pies are perfect for parties, family gatherings, or picnics. Their bite-sized nature makes them easy to share and enjoy. Consider setting up a dessert table with various toppings, like chocolate sauce or caramel, for guests to customize their treats.
3. Family Baking Activity: Making Cherry Bliss Mini Pie Bites can be a fun activity for children and families. Involve the kids in rolling out dough, cutting shapes, and filling the pies. It’s a great way to create lasting memories while teaching them valuable baking skills.
Storage and Shelf Life
To maintain the freshness and quality of your mini pie bites, follow these storage tips:
1. Storing: Store your cooled mini pies in an airtight container at room temperature for up to 2 days. If you want to keep them longer, consider refrigerating them for up to a week.
2. Reheating: To reheat, preheat your oven to 350°F (175°C) and place the mini pies on a baking sheet. Heat for about 10-15 minutes, or until warmed through. This will help retain their crispy crust.
3. Freezing Options: If you want to prepare ahead, you can freeze the unbaked pie bites. Assemble them, then place them on a baking sheet to freeze individually before transferring to a freezer bag. When ready to bake, you can bake them directly from frozen, adding a few extra minutes to the baking time.
Conclusion
Cherry Bliss Mini Pie Bites are a delightful treat that combines the sweetness of cherries with a flaky, buttery crust. The ease of making these mini pies makes them a favorite for any baking enthusiast, whether you are an experienced baker or just starting. Their versatility allows you to serve them at various occasions, from casual family dinners to elegant gatherings.
Encourage your friends and family to try making this recipe, and don’t hesitate to share your experiences and variations. The joy of baking, paired with the deliciousness of these mini pies, is sure to create wonderful memories and satisfy sweet cravings. So roll up your sleeves, gather your ingredients, and start creating these delightful Cherry Bliss Mini Pie Bites today!
