Introduction
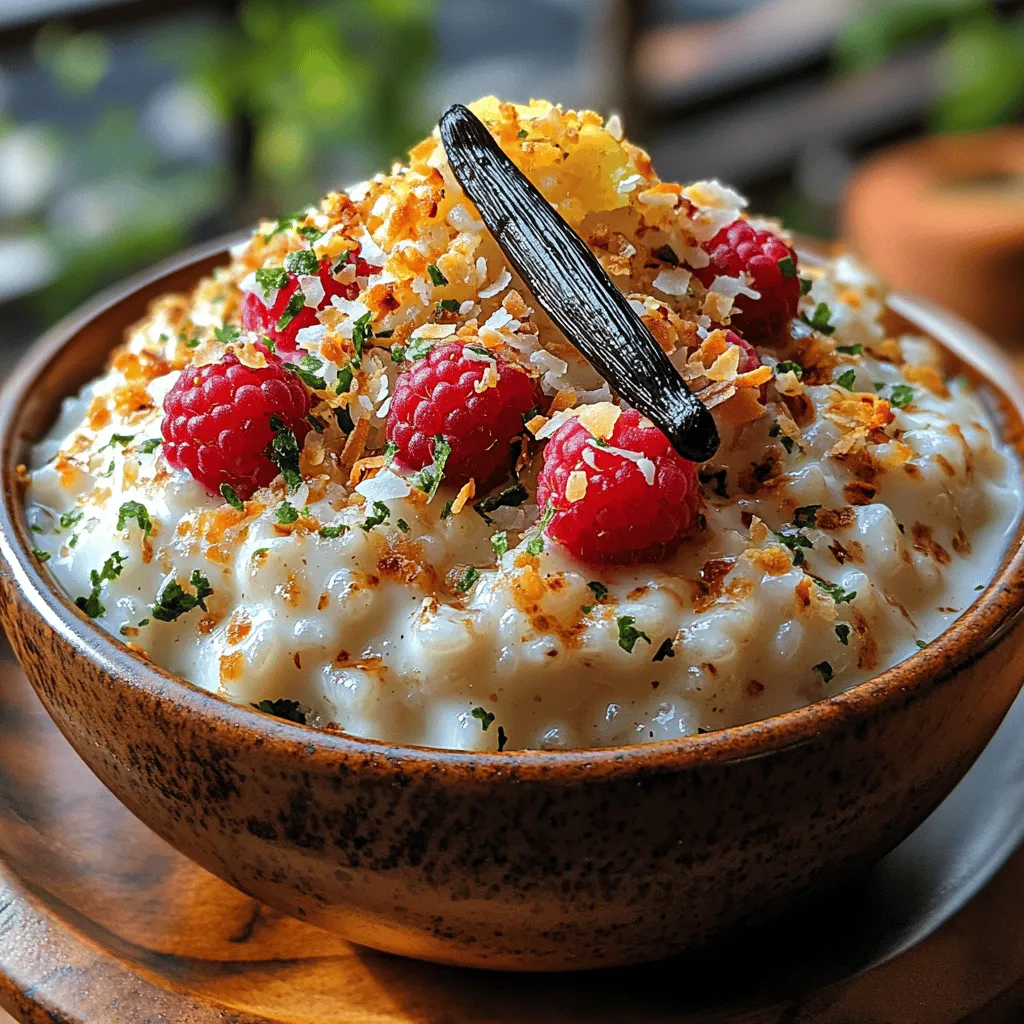
Rice pudding is a classic dessert that transcends cultures, offering a comforting and indulgent experience with every spoonful. Among the myriad of variations, the Creamy Dreamy Vanilla Bean Rice Pudding stands out for its rich, velvety texture and aromatic flavor profile. This delightful dish is not just a simple dessert; it embodies a journey through culinary heritage, showcasing the transformative power of basic ingredients into something truly exquisite.
As we embark on the adventure of creating this creamy delicacy, we’ll explore the origins of rice pudding, its significance in various cultures, and the easy steps to achieve a perfect bowl of this timeless treat. Whether you’re an experienced home cook or a novice in the kitchen, this recipe will guide you through the process of making rice pudding that is not only pleasing to the palate but also a feast for the senses.
Understanding the Origins of Rice Pudding
The History of Rice Pudding: From Ancient Grains to Modern Delicacies
Rice pudding has a storied past, with its origins tracing back to ancient civilizations. Historical records indicate that rice was cultivated in Asia as early as 5000 BC, with the earliest forms of rice pudding emerging in regions where rice was a staple food. The combination of rice, milk, and sugar created a nourishing dish that was cherished by families across generations.
In Europe, rice pudding gained popularity during the Middle Ages, particularly as rice became more accessible. The dish transformed from a simple porridge to a sweet, creamy dessert, often flavored with spices like cinnamon and nutmeg. Different cultures adapted rice pudding to their local tastes, leading to a variety of preparations. In Italy, for example, it evolved into the beloved “risotto dolce,” while in parts of the Middle East, it became known as “muhallebi,” often garnished with nuts and fruits.
Cultural Significance of Rice Pudding in Global Cuisine
Rice pudding is not just a culinary staple; it holds cultural significance in many traditions. In many cultures, it is a comfort food that evokes nostalgia, often prepared during family gatherings and celebrations. For instance, in the United States, rice pudding is a popular dessert in homes across the country, often served warm with a sprinkle of cinnamon or nutmeg, reminding many of childhood memories.
In India, rice pudding is known as “kheer” and is a staple during festivals and special occasions, showcasing the dish’s ability to bring people together. Similarly, in Latin America, variations like “arroz con leche” are celebrated, often infused with flavors like vanilla, cinnamon, and citrus. These cultural nuances highlight rice pudding’s versatility and its ability to adapt to different ingredients and traditions.
Different Types of Rice Pudding: A Glimpse into Variety
While the classic version of rice pudding is beloved, many variations exist around the world. From creamy versions thickened with egg yolks to lighter renditions made with coconut milk, the possibilities are endless. Some popular variations include:
– Arroz con Leche: A Latin American classic, this version often includes sweetened condensed milk and is flavored with cinnamon and vanilla.
– Kheer: An Indian dessert that typically incorporates cardamom and is garnished with nuts and dried fruits.
– Risotto Dolce: An Italian take on rice pudding, often made with Arborio rice and flavored with lemon or orange zest.
Each type of rice pudding offers a unique taste experience, allowing for creativity in the kitchen as you experiment with flavors and ingredients.
Ingredients for Creamy Dreamy Vanilla Bean Rice Pudding
To create the perfect Creamy Dreamy Vanilla Bean Rice Pudding, you’ll need a selection of simple yet high-quality ingredients. Here’s what you’ll need:
Essential Ingredients for Basic Rice Pudding
– Rice: The foundation of this dish. Short-grain rice, such as Arborio or sushi rice, is ideal for its starch content, which helps achieve that creamy consistency. However, long-grain rice like basmati or jasmine can also be used for a different texture.
– Milk: Whole milk is recommended for a rich, creamy texture, but you can also use a combination of milk and cream for an even more indulgent dessert.
– Sugar: Granulated sugar is commonly used, but you can substitute with brown sugar or even maple syrup for a deeper flavor.
– Vanilla Bean: The star ingredient that imparts a distinctive flavor. Fresh vanilla beans provide the best taste, but vanilla extract can be used as a substitute in a pinch.
Choosing the Right Rice: Types and Their Characteristics
Selecting the right type of rice is crucial for achieving the desired texture of your pudding. Here’s a quick guide to help you choose:
– Short-Grain Rice: This type of rice is high in starch, which makes it ideal for creamy dishes. Arborio rice, commonly used in risottos, is a popular choice for rice pudding due to its ability to absorb liquid while remaining tender.
– Medium-Grain Rice: Varieties like Calrose rice can also work well, offering a balance between creaminess and structure.
– Long-Grain Rice: While less starchy, long-grain varieties can be used if you prefer a less creamy texture. Just keep in mind that the pudding may not be as thick.
The Role of Milk in Rice Pudding: Fresh vs. Dried
The choice of milk plays a significant role in the final flavor and creaminess of your rice pudding.
– Whole Milk: Provides a rich and creamy consistency, enhancing the overall taste of the pudding.
– Cream: Adding heavy cream will elevate the richness, making for an indulgent dessert.
– Non-Dairy Alternatives: For a vegan version, consider using coconut milk or almond milk. These alternatives will impart their unique flavors while still maintaining a creamy texture.
Optional Ingredients for Flavor Variations
While vanilla bean is the primary flavoring agent in this recipe, you can customize your rice pudding with a variety of optional ingredients:
– Cinnamon: A sprinkle of ground cinnamon can add warmth and spice.
– Nutmeg: A dash of nutmeg enhances the flavor profile and adds depth.
– Zest: Citrus zest, such as lemon or orange, can brighten the dish, adding a refreshing twist.
– Dried Fruits: Incorporating raisins or dried apricots can introduce sweetness and texture.
The Tools You Need for Making Rice Pudding
Having the right kitchen tools can make the process of creating your creamy rice pudding much smoother. Here’s what you’ll need:
Must-Have Kitchen Equipment for Rice Pudding
– Saucepan: A medium-sized saucepan with a heavy bottom is essential for even cooking. This will help prevent the rice from sticking or burning as it simmers.
– Wooden Spoon or Spatula: A wooden spoon is perfect for stirring the pudding as it cooks, ensuring that the rice does not stick to the bottom of the pan.
Choosing the Right Cooking Surface: Gas vs. Electric
Your choice of cooking surface can also impact the cooking process:
– Gas Stovetop: Offers precise temperature control, allowing you to adjust the heat easily while cooking the pudding.
– Electric Stovetop: While convenient, it may take longer to adjust temperatures, so patience is key.
Essential Tools: Measuring Cups and Spoons
Accurate measurements are vital for achieving the perfect balance of flavors and textures. Ensure you have measuring cups and spoons handy to measure your ingredients precisely.
Step-by-Step Guide to Making Creamy Dreamy Vanilla Bean Rice Pudding
Now that you have a solid understanding of the ingredients and tools needed, let’s dive into the step-by-step process of making your own Creamy Dreamy Vanilla Bean Rice Pudding.
Preparing the Rice
1. Rinse the Rice: Start by rinsing your rice under cold water to remove excess starch. This helps prevent the pudding from becoming overly sticky.
2. Soak (Optional): If using long-grain rice, consider soaking it for about 30 minutes to help it cook evenly. This step is not necessary for short-grain varieties.
Cooking the Rice
1. Combine Ingredients: In your saucepan, combine the rinsed rice, milk, and a pinch of salt. If desired, add a splash of vanilla extract for an extra boost of flavor.
2. Bring to a Simmer: Heat the mixture over medium heat until it begins to simmer. Stir occasionally to prevent sticking.
3. Reduce Heat: Once simmering, reduce the heat to low. Cover the saucepan and let it cook gently, stirring frequently to ensure even cooking, for about 20-25 minutes, or until the rice is tender and the mixture is creamy.
Adding Flavors
1. Incorporate Vanilla: After the rice has cooked, split the vanilla bean lengthwise and scrape the seeds into the pudding. Stir well to incorporate the seeds and their fragrant flavor.
2. Sweeten to Taste: Add sugar gradually, tasting as you go, until you reach your desired level of sweetness.
Final Touches
1. Thicken the Pudding: If necessary, continue to cook the pudding over low heat until it reaches your desired thickness. Remember, it will thicken as it cools.
2. Serve Warm or Chilled: Rice pudding can be enjoyed warm right from the stove or allowed to cool and served chilled. Both options offer a delightful experience.
With these steps, you are well on your way to crafting your own Creamy Dreamy Vanilla Bean Rice Pudding. The process is straightforward and rewarding, allowing you to enjoy a dessert that is not only delicious but also rich in history and culture.
In the next part of this article, we will dive into cooking techniques, storage tips, and serving suggestions to enhance your rice pudding experience even further. Stay tuned for more insights that will help you become a rice pudding aficionado!