Introduction
Chocolate chip cookies hold a special place in the hearts of many, transcending generations with their warm, sweet aroma wafting through family kitchens. The story of the chocolate chip cookie began in the 1930s when Ruth Wakefield, the owner of the Toll House Inn in Massachusetts, decided to experiment with a chocolate bar. Instead of melting the chocolate into the dough, she chopped it into bits, giving birth to the iconic cookie we know and love today. Since then, chocolate chip cookies have become a staple treat in American households, often associated with comfort, celebration, and the simple joy of baking.
Homemade cookies, in particular, foster family traditions that bring everyone together. There’s something incredibly fulfilling about measuring, mixing, and baking alongside loved ones, whether it’s during the holidays, after school, or as a weekend treat. The process of creating something from scratch evokes a sense of accomplishment, and the end product—a batch of warm, gooey chocolate chip cookies—creates a perfect moment to share.
This comprehensive guide aims to equip you with everything you need to know to bake the perfect chocolate chip cookies. From understanding the essential ingredients and their roles to the science behind baking, we will cover it all. You’ll learn about various techniques, must-have kitchen tools, and even some delicious variations to try. Whether you are a seasoned baker or a novice in the kitchen, this guide will help you craft cookies that are sure to impress.
Understanding the Basics of Chocolate Chip Cookies
The Appeal of Chocolate Chip Cookies
Chocolate chip cookies are beloved for their perfect balance of texture and flavor. The combination of a chewy center and crispy edges, punctuated by melty chocolate chips, makes them a timeless treat. Their versatility allows them to be enjoyed in numerous settings: as an after-school snack, a dessert at a dinner party, or even just a midnight indulgence. They can be customized with different mix-ins or served with a scoop of ice cream for an extra special dessert.
Key Ingredients and Their Roles
To master the art of chocolate chip cookies, it’s essential to understand the key ingredients that contribute to their delightful characteristics. Each component plays a significant role in achieving the desired flavor and texture.
Flour: Types and How They Affect Texture
Flour is the foundation of any cookie recipe. The type of flour used can significantly affect the final texture of your cookies. All-purpose flour is the most common choice and provides a balanced outcome. On the other hand, using cake flour will result in a softer, more tender cookie due to its lower protein content, while bread flour, with its higher protein level, can create a chewier texture. When experimenting, be mindful of how different flours can alter your cookie’s structure.
Sugar: Brown vs. White Sugar and Their Impact on Flavor
Sugar not only sweetens cookies but also contributes to their texture and flavor. Brown sugar contains molasses, which adds moisture and a subtle caramel flavor, resulting in a chewier cookie. White sugar, meanwhile, promotes a crisper texture. Many recipes use a combination of both to achieve the desired balance of chewy and crisp.
Butter: Importance of Temperature and Type (Salted vs. Unsalted)
Butter is crucial for flavor and texture. The temperature of the butter can significantly influence the outcome of your cookies. Softened butter, at room temperature, allows for better incorporation of air during the creaming process, leading to a lighter cookie. Unsalted butter is generally preferred, as it allows you to control the salt content in your recipe. However, if you only have salted butter on hand, you can reduce the added salt in the recipe accordingly.
Eggs: Their Role in Binding and Moisture
Eggs serve as a binding agent in cookie dough, providing structure and moisture. They also contribute to the overall richness of the cookies. Using room temperature eggs helps them emulsify better with the butter and sugar mixture, ensuring a smoother dough.
Chocolate Chips: Types and How to Choose the Best Quality
The star of the show in chocolate chip cookies is, of course, the chocolate chips. The type of chocolate you choose can elevate your cookies significantly. Semi-sweet chocolate chips are the classic choice, but you can also experiment with dark chocolate, milk chocolate, or even white chocolate for a different flavor profile. High-quality chocolate will provide a more intense flavor and better melting qualities, enhancing the overall cookie experience.
The Science Behind Cookie Baking
Understanding the science behind baking can greatly improve your cookie-making skills. Here are a few key concepts to consider:
How Baking Soda and Baking Powder Work
Baking soda (sodium bicarbonate) is a leavening agent that requires an acidic component to activate, such as brown sugar or yogurt. It produces carbon dioxide gas, which helps the cookies rise. Baking powder, on the other hand, contains both an acid and a base. It can be double-acting, meaning it releases gas upon mixing and again when heated. Choosing the right leavening agent is crucial for achieving the right cookie texture.
The Maillard Reaction and Its Role in Flavor Enhancement
The Maillard reaction is a complex chemical reaction that occurs when sugars and proteins are exposed to heat. This process creates new flavors and aromas, contributing to the deliciousness of baked goods. Understanding this reaction can help you achieve the perfect golden-brown cookies with a rich flavor profile.
Essential Tools for Baking Chocolate Chip Cookies
Having the right kitchen tools can make your cookie-baking experience smoother and more enjoyable. Here’s a list of must-have tools to ensure your success in the kitchen.
Mixing Bowls: Material Options and Sizes
Invest in a set of mixing bowls that come in various sizes. Glass or stainless steel bowls are excellent choices, as they are durable and allow you to see the mixture easily. A larger bowl is ideal for mixing the dough, while smaller ones can be used for measuring out your ingredients.
Measuring Cups and Spoons: Importance of Accuracy in Baking
Baking is a precise science, so accurate measurements are crucial. Use dry measuring cups for flour and sugar and liquid measuring cups for liquids. A set of measuring spoons is also essential for measuring smaller amounts of ingredients like baking soda, salt, and vanilla extract.
Baking Sheets: Types and Their Impact on Cooking Time
Baking sheets come in various materials, including aluminum and non-stick versions. Heavy-duty aluminum sheets are favored for their even heat distribution, ensuring that cookies bake uniformly. If you have non-stick sheets, consider using parchment paper for easy removal and cleanup.
Parchment Paper: Benefits for Easy Cleanup and Even Baking
Parchment paper is a baker’s best friend. It prevents cookies from sticking to the baking sheet and promotes even baking. Line your baking sheets with parchment paper for easy cleanup and to achieve a perfectly baked cookie every time.
Cooling Racks: Importance of Proper Cooling
Once your cookies are out of the oven, transferring them to a cooling rack is essential. This allows air to circulate and prevents them from becoming soggy. A good cooling rack will ensure your cookies maintain the right texture and flavor as they cool.
Step-by-Step Guide to Baking Chocolate Chip Cookies
Now that you have a solid understanding of the ingredients and tools, it’s time to dive into the step-by-step process of baking chocolate chip cookies. Follow these instructions closely for the best results.
Preparing the Dough
Begin by gathering all your ingredients and tools. Preheat your oven to 350°F (175°C) and line your baking sheets with parchment paper. This preparation step ensures a smooth baking process.
Measuring Ingredients Accurately
Measure your ingredients accurately to achieve the ideal cookie texture. Use the spoon-and-level method for flour: spoon the flour into your measuring cup and then level it off with a knife. This prevents packed flour, which can lead to dense cookies.
Creaming Butter and Sugar: Techniques for the Perfect Texture
In a large mixing bowl, combine your softened butter, brown sugar, and white sugar. Using an electric mixer or a whisk, cream the butter and sugars together until the mixture is light and fluffy. This step is crucial, as it incorporates air into the dough, leading to a softer, more tender cookie.
Adding Eggs and Vanilla: Tips for Seamless Incorporation
Once your butter and sugar are well combined, add the eggs, one at a time, mixing well after each addition. Then, pour in the vanilla extract. Mixing these ingredients thoroughly ensures a uniform dough.
Gradually Mixing in the Dry Ingredients
In a separate bowl, whisk together your dry ingredients: flour, baking soda, and salt. Gradually add the dry mixture to the wet ingredients, mixing until just combined. Be careful not to overmix, as this can lead to tough cookies.
Folding in Chocolate Chips: Ensuring Even Distribution
Finally, gently fold in the chocolate chips using a spatula or wooden spoon. This step ensures that the chocolate is evenly distributed throughout the dough, giving every cookie a delightful burst of chocolate flavor.
Chilling the Dough
For the best results, consider chilling your cookie dough for at least 30 minutes before baking. Chilling helps to solidify the fat in the dough, which can lead to thicker, chewier cookies. It also allows the flavors to meld together, enhancing the overall taste of the cookies.
With the dough prepared and chilled, you are now equipped to bake the perfect chocolate chip cookies. Stay tuned for the next part of this guide, where we will delve into the baking process, cooling techniques, and variations to try for an even more exciting cookie experience.
Importance of Chilling for Flavor and Texture
Chilling your pancake batter is an often-overlooked step that can significantly enhance the flavor and texture of your fluffy lemon ricotta pancakes. By allowing the batter to rest in the refrigerator, the flour has time to fully hydrate, resulting in a smoother batter. This resting period also allows the flavors—especially the lemon zest and ricotta—to meld beautifully, creating a more cohesive taste profile.
Recommended Chilling Times
For optimal results, aim to chill your batter for at least 30 minutes, but if time permits, extending this to an hour is even better. This will not only help the pancakes rise higher but also contribute to their fluffiness. If you’re in a hurry, you can skip this step, but keep in mind that the texture might not be as airy and the flavor as pronounced.
Portioning and Baking
Once your batter has chilled, it’s time to portion and bake your pancakes. Using a measuring cup or a ladle makes this process easier and ensures that each pancake is of uniform size, promoting even cooking.
Best Methods for Portioning Pancake Batter
1. Using a Measuring Cup: A 1/4 cup measuring cup is ideal for portioning out the batter. This size yields pancakes that are perfectly fluffy and easy to flip.
2. Ladle: If you prefer a larger pancake, a ladle can help you pour out a more generous amount of batter.
3. Squeeze Bottle: For those who want precision in their pancake shapes, filling a squeeze bottle with the batter allows for creative designs and uniformity.
Ideal Cooking Temperature and Time
For the best results, heat your skillet or griddle to medium heat, which is typically around 350°F. A well-heated surface allows the pancakes to cook evenly, creating a delightful golden-brown exterior while keeping the interior light and fluffy.
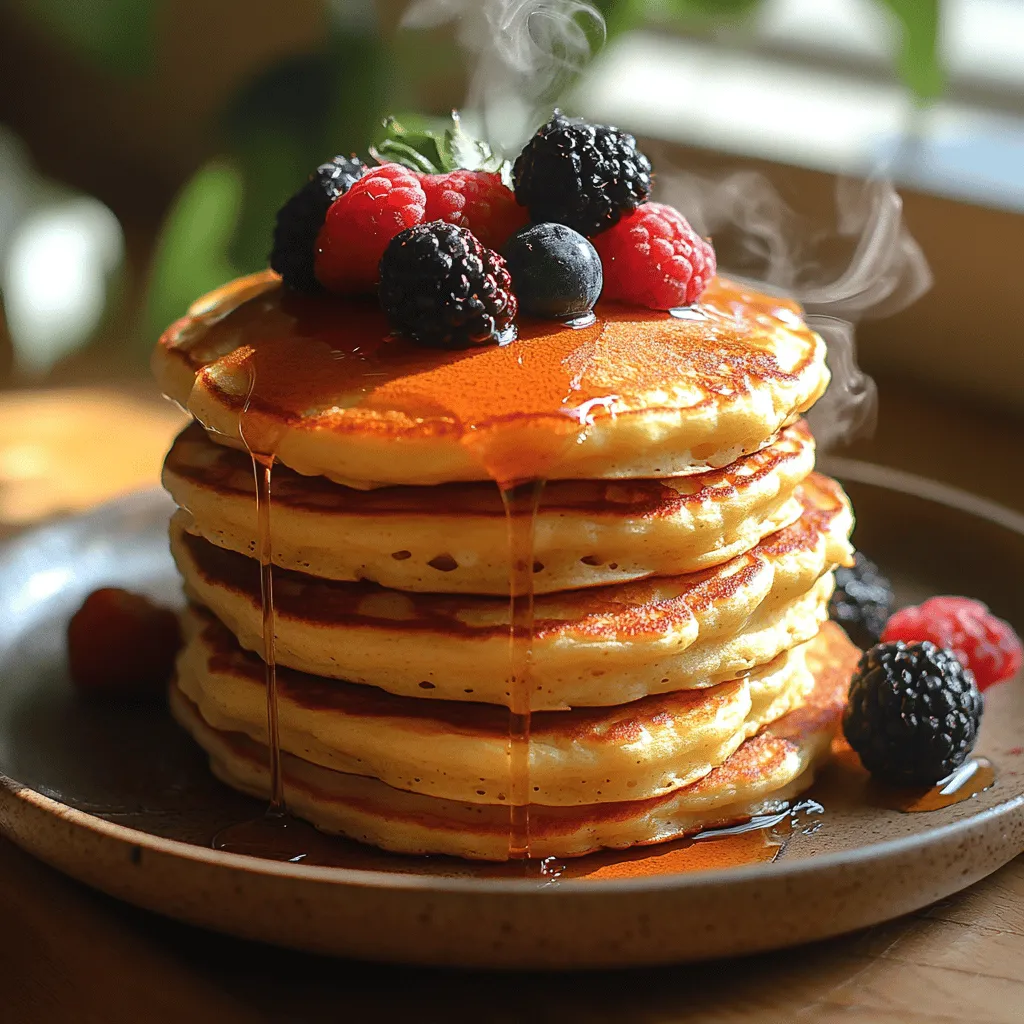
Cook each pancake for approximately 3-4 minutes on the first side. You’ll know it’s time to flip when you see bubbles forming on the surface and the edges look set. After flipping, cook for an additional 2-3 minutes until both sides are golden brown.
How to Know When Pancakes Are Done: Visual Cues and Timing
Determining the doneness of your pancakes is easy. Once flipped, the pancakes should puff slightly and turn a golden brown. If you press gently on the top of a pancake, it should spring back without leaving an indentation. You can also use a toothpick inserted into the center; it should come out clean or with just a few moist crumbs.
Cooling and Storing Pancakes
Once your pancakes are cooked, allow them to cool slightly on a wire rack. This prevents them from becoming soggy, as cooling on a plate can trap steam.
Proper Cooling Methods to Maintain Texture
Cooling pancakes on a wire rack allows air to circulate around them, keeping their texture light and airy. If you don’t have a wire rack, placing them on a plate is fine—just be sure to keep them in a single layer without stacking until they are cool.
Storing Pancakes for Freshness: Best Practices
Leftover pancakes can be stored in an airtight container in the refrigerator for about 3 days. If you want to keep them for longer, freezing is a great option. Place parchment paper between layers of pancakes in a freezer-safe bag to prevent sticking and store them for up to 2 months. When you’re ready to enjoy them again, simply reheat in a toaster, oven, or microwave until warmed through.
Exploring Variations of Lemon Ricotta Pancakes
While the classic lemon ricotta pancake is delightful on its own, there are numerous variations and enhancements you can make to elevate your breakfast experience.
Classic Variations
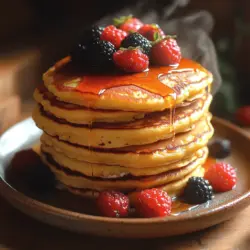
– Berry-Infused Pancakes: Fold in fresh blueberries, raspberries, or strawberries into the batter for a fruity twist. The berries add a burst of flavor and introduce a beautiful color contrast.
– Savory Lemon Ricotta Pancakes: Omit the sugar and add herbs like chives or dill to create a savory version that pairs well with smoked salmon or a poached egg.
Flavor Enhancements
– Adding Nuts: Walnuts or pecans can be chopped and mixed into the batter for added crunch and a rich flavor profile. Toasting the nuts beforehand enhances their natural flavors.
– Incorporating Spices: A pinch of cinnamon or nutmeg can add warmth to your pancakes, complementing the lemon flavor beautifully. A sprinkle of sea salt can also enhance the taste.
– Chocolate Chips: For a decadent twist, fold in mini chocolate chips for a sweet contrast to the tart lemon.
Health-Conscious Options
For those looking to make healthier choices, there are several substitutions you can consider:
– Gluten-Free Ricotta Pancakes: Substitute regular flour with a gluten-free blend or almond flour. Be sure to adjust the liquid content since gluten-free flours can absorb more moisture.
– Vegan Lemon Ricotta Pancakes: Replace eggs with flaxseed meal or chia seeds mixed with water, and substitute dairy ricotta with a plant-based alternative, like almond or coconut yogurt.
– Reducing Sugar: Use natural sweeteners like maple syrup or agave nectar to reduce refined sugar content while still achieving a sweet flavor.
The Cultural Impact of Pancakes
Lemon ricotta pancakes represent a delightful blend of culinary cultures, often found on brunch menus in trendy cafes. Their light, fluffy texture and zesty flavor have made them a popular choice among foodies and home cooks alike.
Pancakes in Pop Culture
Pancakes have made appearances in various films and television shows, often symbolizing comfort and family gatherings. Their presence in breakfast scenes evokes feelings of nostalgia and warmth, making them a staple in many households.
Celebrating Occasions with Pancakes
Pancakes are not just for breakfast—they can be dressed up for special occasions. Consider serving lemon ricotta pancakes at brunch gatherings, birthday celebrations, or holiday mornings for a unique twist on traditional fare.
Making Pancakes as Gifts: Presentation Ideas and Packaging
Surprise friends and family by gifting them a homemade pancake mix. Layer the dry ingredients in a mason jar, attach a label with instructions, and include a bottle of your favorite maple syrup. This thoughtful gesture is perfect for housewarmings, holidays, or just because.
Conclusion
Making fluffy lemon ricotta pancakes at home is not only a rewarding culinary experience but also a fantastic way to bring joy to your breakfast table. Their simple ingredients and straightforward preparation make them an accessible dish that can be enjoyed by everyone, from novice cooks to seasoned chefs.
With endless possibilities for variations and enhancements, these pancakes can be customized to suit any palate or dietary preference. Whether you choose to stick with the classic recipe or experiment with flavors, the joy of creating and sharing these delectable pancakes is sure to bring smiles to all who partake. So grab your ingredients, gather your loved ones, and enjoy a delightful breakfast that celebrates the simplicity and pleasure of home cooking.